Quantcast
Channel: Marine Depot Blog
Viewing all 374 articles
Browse latest View live

7 Cool Tools to Clean Your Dirty Reef Tank

$
0
0

With spring in full swing, it may be time to give your aquarium a good spring cleaning!

I won’t lecture you on the importance of regular tank maintenance. If you’ve been in the hobby for a while, you already know how important it is to stay consistent with aquarium upkeep.

Today we’re here to talk about all the tools available to help us with the dirty job of cleaning up a fish tank.

The easiest way to keep an aquarium clean is to get a clean-up crew. I’m not talking about an aquarium maintenance guy that comes over to clean your tank, either. I’m referring to the unsung heroes of reef aquaria—the snails, hermit crabs, shrimp and the like—who slither, scuttle and swim around your tank keeping the sand bed, rockwork and even other animals clean.

Truth be told, these animals can only do so much. Even if you’ve got a diverse CUC, state-of-the-art aquarium equipment and change your water regularly, you’ll still need to apply a little elbow grease every now and again to make your tank spotless and draw the “oohs” and “aahs” of guests.

There are a bunch of cool tools at your disposal which are great for Spring cleaning and year-round use. Here are some of my favorites:


Algae Magnets

The only tank maintenance tool I remember from my dad’s old aquarium was the algae magnet. It made a particular impression on me because I can recall how fun it was to move around and how satisfying it felt to clean off the glass and peer into a clear tank.

Using an aquarium algae magnet isn’t rocket science, but there are some good practices I recommend. The first is to use your algae magnet often. Doing a little work here and there won’t allow as much gunk to build-up so you won’t have to work as hard.

The way an algae magnet works is simple. There are two parts, both magnetic. Place one part outside your tank and one inside. The inside magnet, the part submerged underwater, has an abrasive, Velcro-like surface that scrapes algae and calcium deposits off your glass/acrylic as you push the outside magnet with your hand. The outside magnet has a smoother surface that polishes the outside of your aquarium as you move your hand up-and-down, side-to-side for a streak-free shine.

The inside part of some algae magnets, from brands like Algae Free and Mag-Float, will float right to the surface of the water if you remove the outside magnet and break the magnetic field. This is important to note because not all do and occasionally, as you’re moving the outside magnet around, it does separate. Say, if you’re going over a rounded corner, for instance. The inside magnet then sinks to the substrate and sand particles can get caught in the Velcro-like scraping surface (though you also can inadvertently get sand in your algae magnet by simply cleaning close to the sand). You basically just want to be cautious so you don’t scratch your glass or acrylic tank walls. Scratch removal kits are available, but it’s definitely something you want to avoid.

You want to be conscience of the size of the algae magnet when you shop to ensure you choose the proper tool for your tank. You don’t want one too big, you don’t want one to small: like Goldilocks, you want one that’s just right. Even if you have a super-small tank, there is an algae magnet for you (the NanoMag). If you have a glass aquarium, you could use a magnet suitable for glass or acrylic, but if you’ve got an acrylic tank, you need to be careful to use only algae magnets with a scraping surface suitable for your tank so you don’t scratch the walls up.

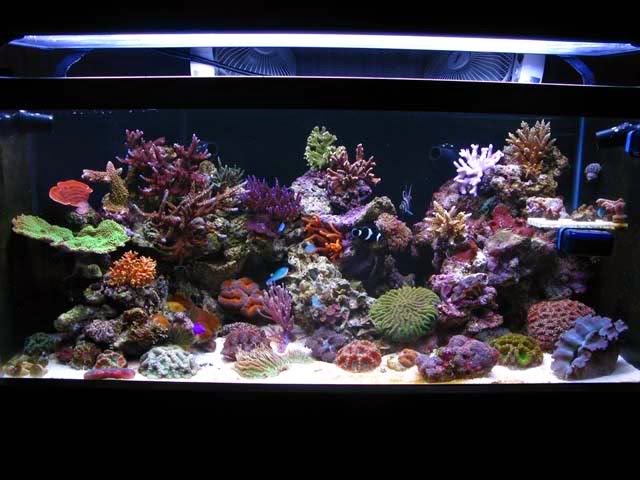
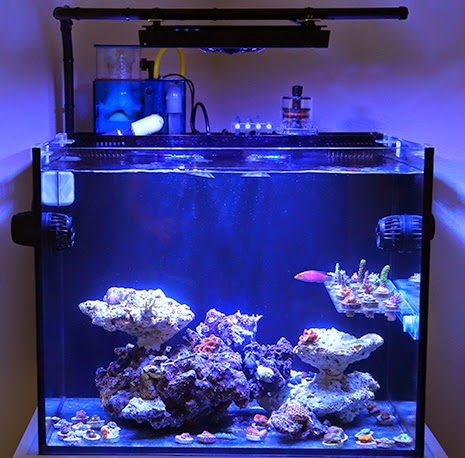
Last but not least, don’t forget to leave room between your tank walls and aquarium rock when you aquascape your tank. You want to have enough space around your reef to move your algae magnet all the way around the tank (it will help with water circulation, too!).


Algae Scrapers

Your algae magnet may be the maintenance tool you use most often, but sometimes you’ll need to access hard-to-reach places or require better leverage to scrape off really stubborn algae or calcium deposits. In these situations, you need an algae scraper.

Handheld algae scrapers are particularly useful. You can get right down to the sand bed and scrape off pretty much anything on your tank walls, even coralline algae. If you’re gluing frags and accidently get some on the outside glass of your tank, just use your algae scraper to get the glue off.

In addition to the handheld variety, there are longer versions, some with telescoping handles, to reach down deep and into tight spots your arm or magnet won’t reach. Most scrapers have interchangeable and replaceable blades available for different applications, such as a rust-resistant stainless steel blade for calcified deposits on glass aquariums, a plastic blade for cleaning acrylic (or glass for general algae removal) and a fabric pad-covered blade for fine cleaning and mopping.


Algae Pads

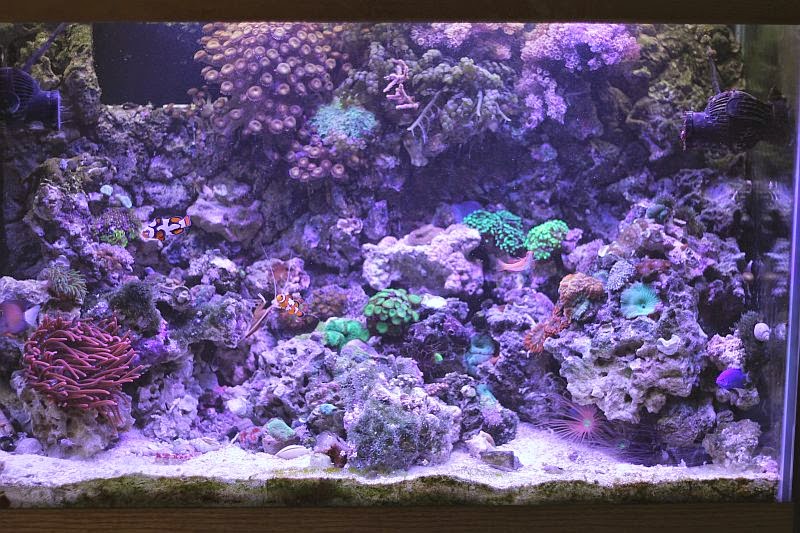
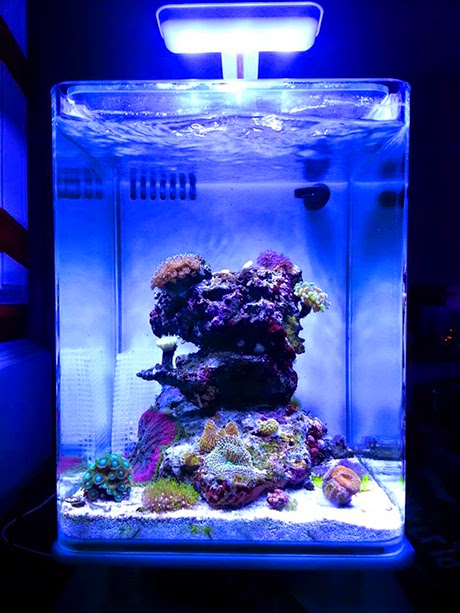
I have an Innovative Marine 38 gallon Nuvo Aquarium and a flat algae magnet or algae scaper doesn’t do a very good job of cleaning the bent corners. This is where algae pads come in handy: they bend and fold according to the curve of your glass to remove unsightly algae no other tool could.

Scrubbing your aquarium with an algae pad isn’t dissimilar from scrubbing a dish with a sponge. Just hold the pad in your hand and push up against the surface you want to clean and scrub back-and-forth.

Algae pads are the least expensive tool for removing algae and many consider them to be indestructible, so they’re a terrific value. They are usually rectangular in shape and can sometimes be attached to a plastic or wood handle to allow you to reach deep and clean those difficult nooks and crannies. Similar to magnets and scrapers, algae pads are available for both glass and acrylic aquariums.


Siphons

Siphons are one of the most common maintenance tools in the aquarium hobby. I have yet to meet a single fresh or saltwater aquarist that hasn’t used one at some point to perform their water changes. Regular water changes are crucial for removing waste and debris so you can replenish your tank with new, clean water.

Most siphons have a rigid plastic tube called a gravel vacuum at one end to clean sand and gravel. Your substrate will tumble inside the gravel vacuum, freeing detritus and debris to be siphoned up and out of your tank into a bucket for removal. It’s easier with larger-grained sand or gravel because the sugar-sized stuff can easily get sucked right out. The trick is to pinch the vinyl tubing to slow down the water flow or use flexible tubing for better control during water changes.


Coral Feederaka Turkey Baster

Coral feeders are essentially modified turkey basters for the aquarium hobby. They are a versatile tool every hobbyist should have in his/her aquarium tool chest.

Coral feeders are affordable, easy to clean and serve a variety of purposes. You can use one to feed your corals, invertebrates, clams, anemones and even fish. You can gently blow sediment and organic matter off corals and live rock. You can stir up detritus to siphon out during a water change. You can suck up extra food, nuisance algae or anything else you don’t want inside your tank.

Even acclimating livestock is made easier with a coral feeder. Just suck out some water from the bag your fish arrived in and replace it with tank water. Then repeat those two steps as needed.

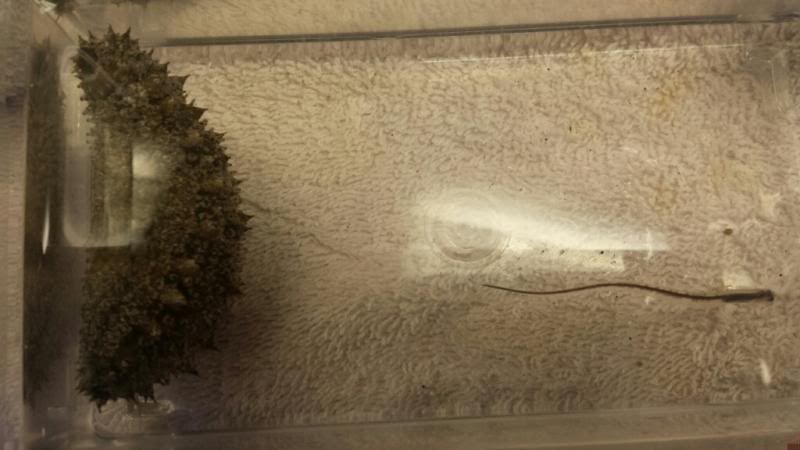
I’ve even used my coral feeder to successfully remove a few bristleworms that had grown too large in my tank, although it’s pretty challenging—I’ve failed more times than I’ve succeeded!


Toothbrush

Toothbrushes are another great tool for cleaning an aquarium. You can buy one just about anywhere or use a spare you already have in the house. They are an inexpensive all-around cleaner that are easy-to-use and give you leverage to clean hard-to-reach areas.

You can use a toothbrush to clean rough surfaces, but you can also use them to scrub more delicate areas, like around your corals. A toothbrush can make it easier to brush glass and rocks to free debris that can be removed during a water change.

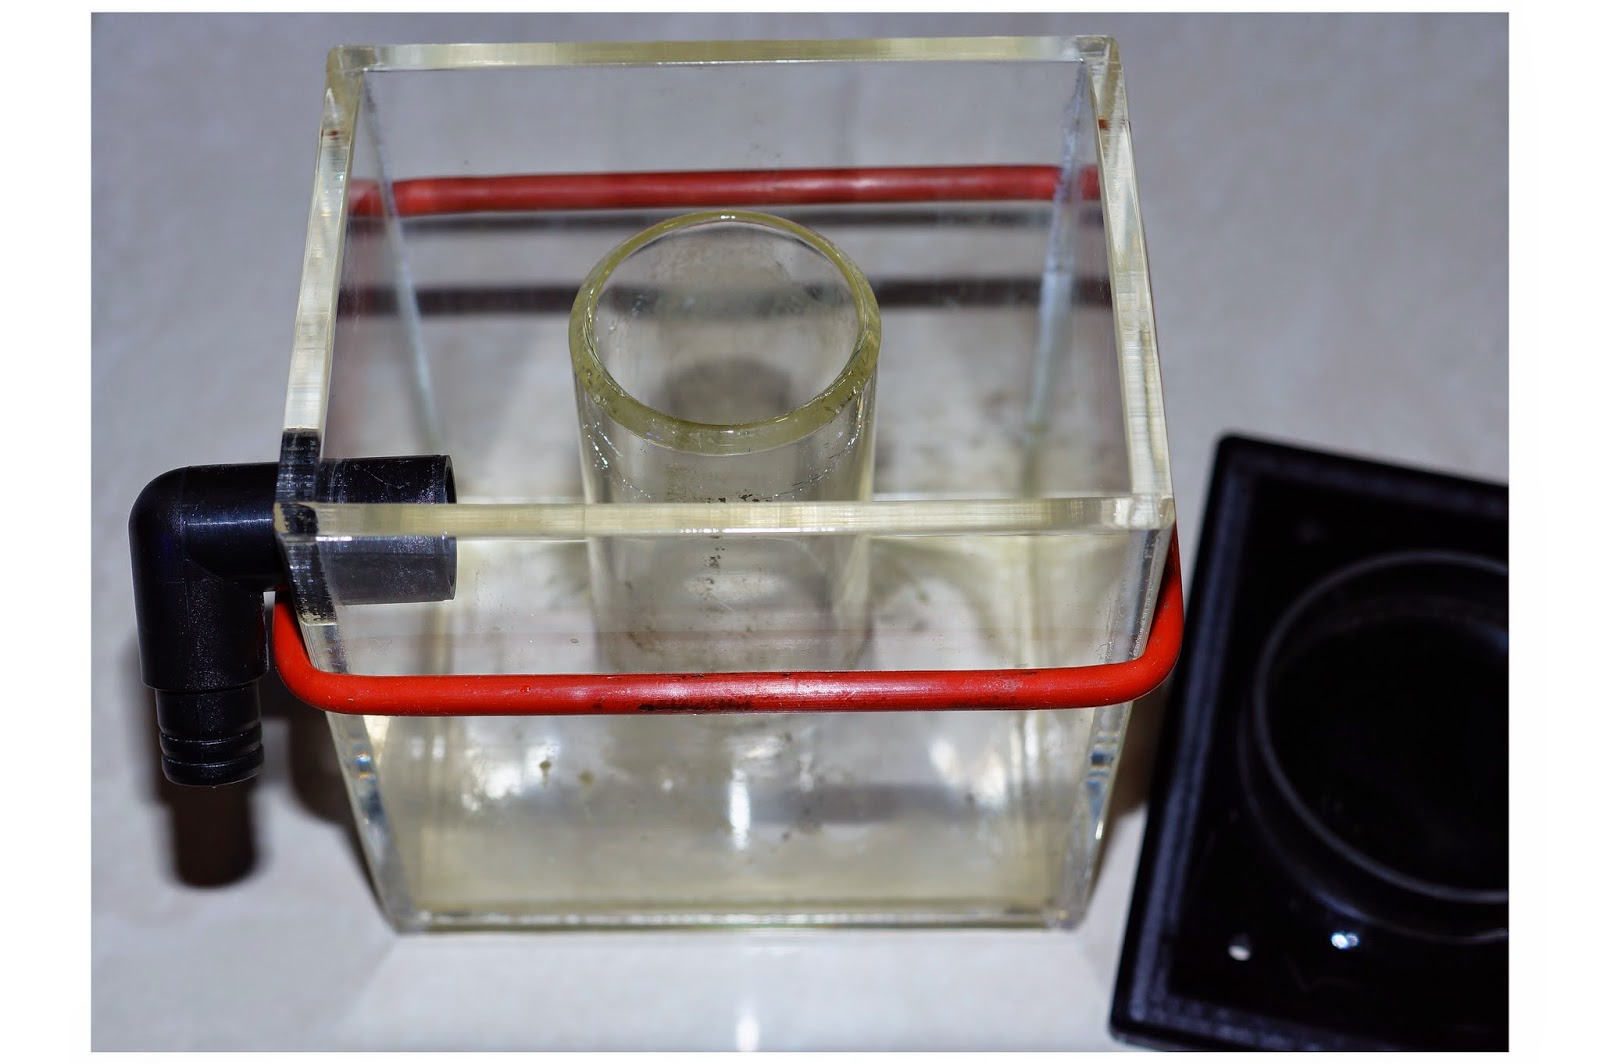
My favorite ways to use a toothbrush for aquarium maintenance is to clean my protein skimmer, media reactor, return pump, powerhead and media baskets. I always keep my protein skimmer collection cup clean with a toothbrush so I can see the bubbles and skimmate being removed from the tank.


Bristle Brushes

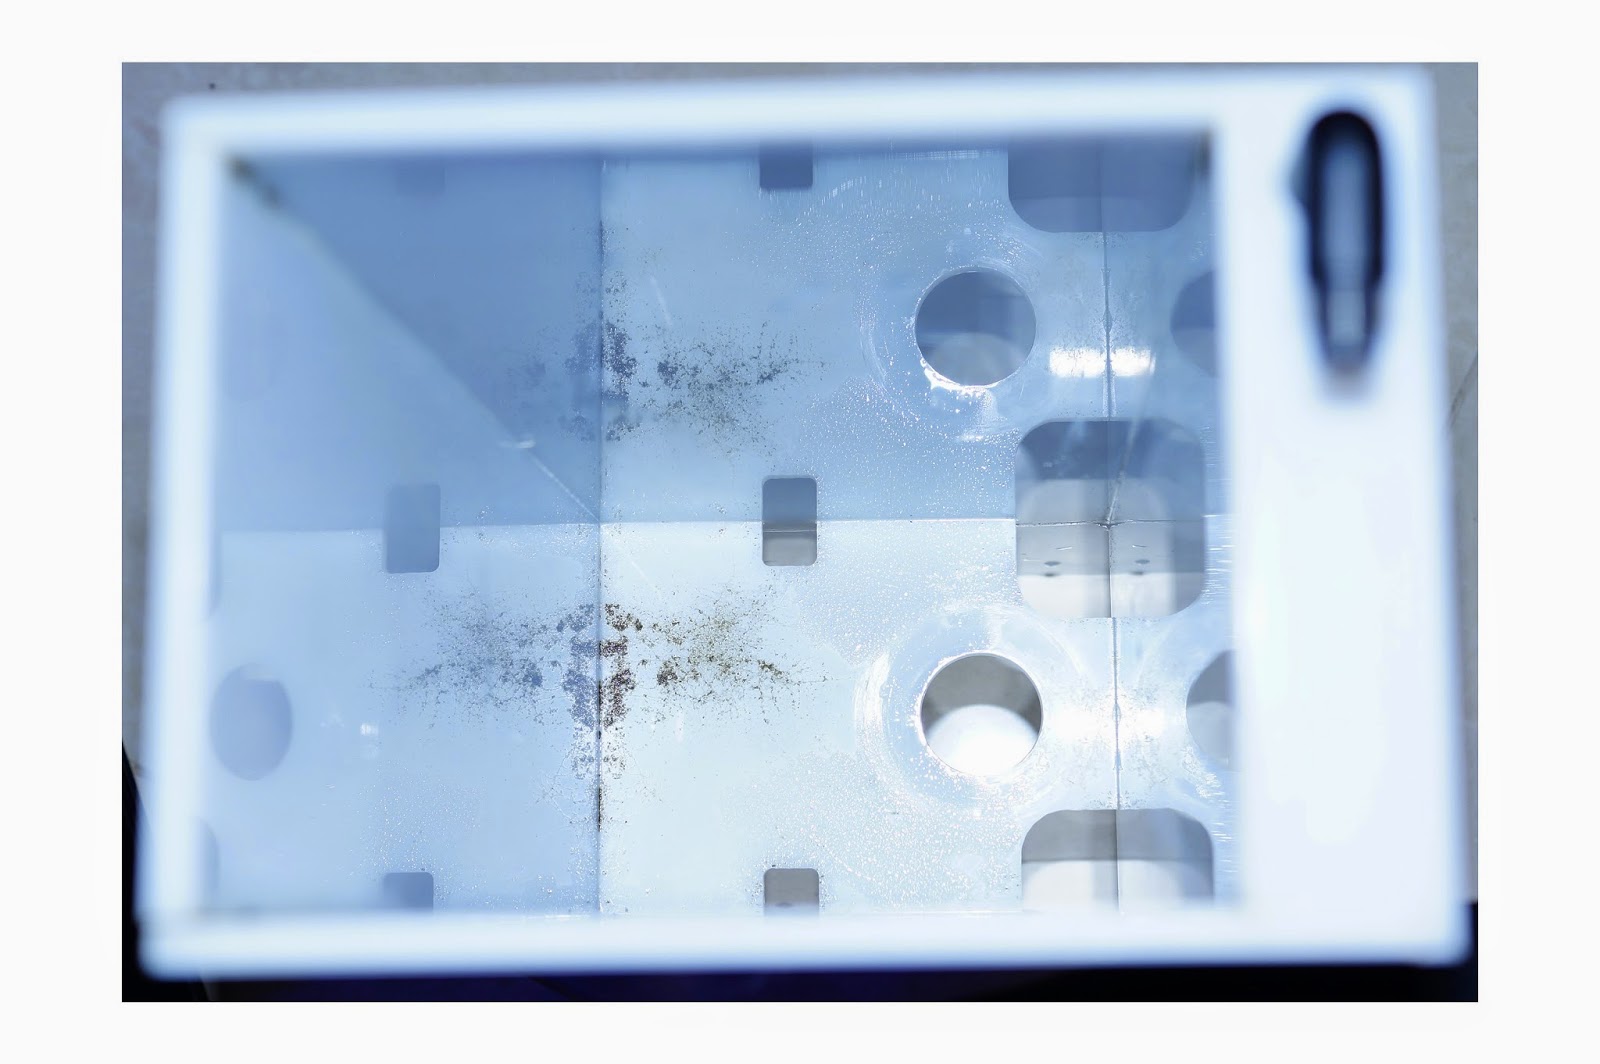
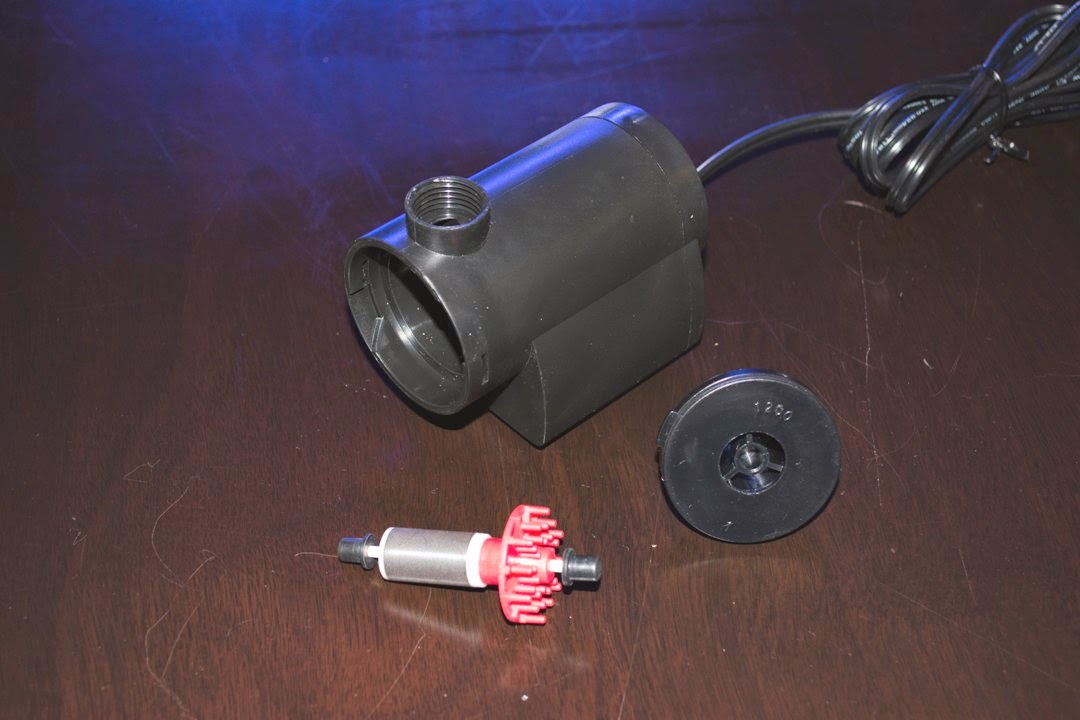
Over time, algae and other buildup needs to be cleaned and cleared from pumps and plumbing parts. Bristle brushes are the best tool I’ve found for cleaning the inside of tubing. They are also useful for cleaning out the grills of your powerhead or inside the pump’s impeller chamber. I’ve used my bristle brush to clean the inside of my protein skimmer collection cup, too.


Pump Soaks

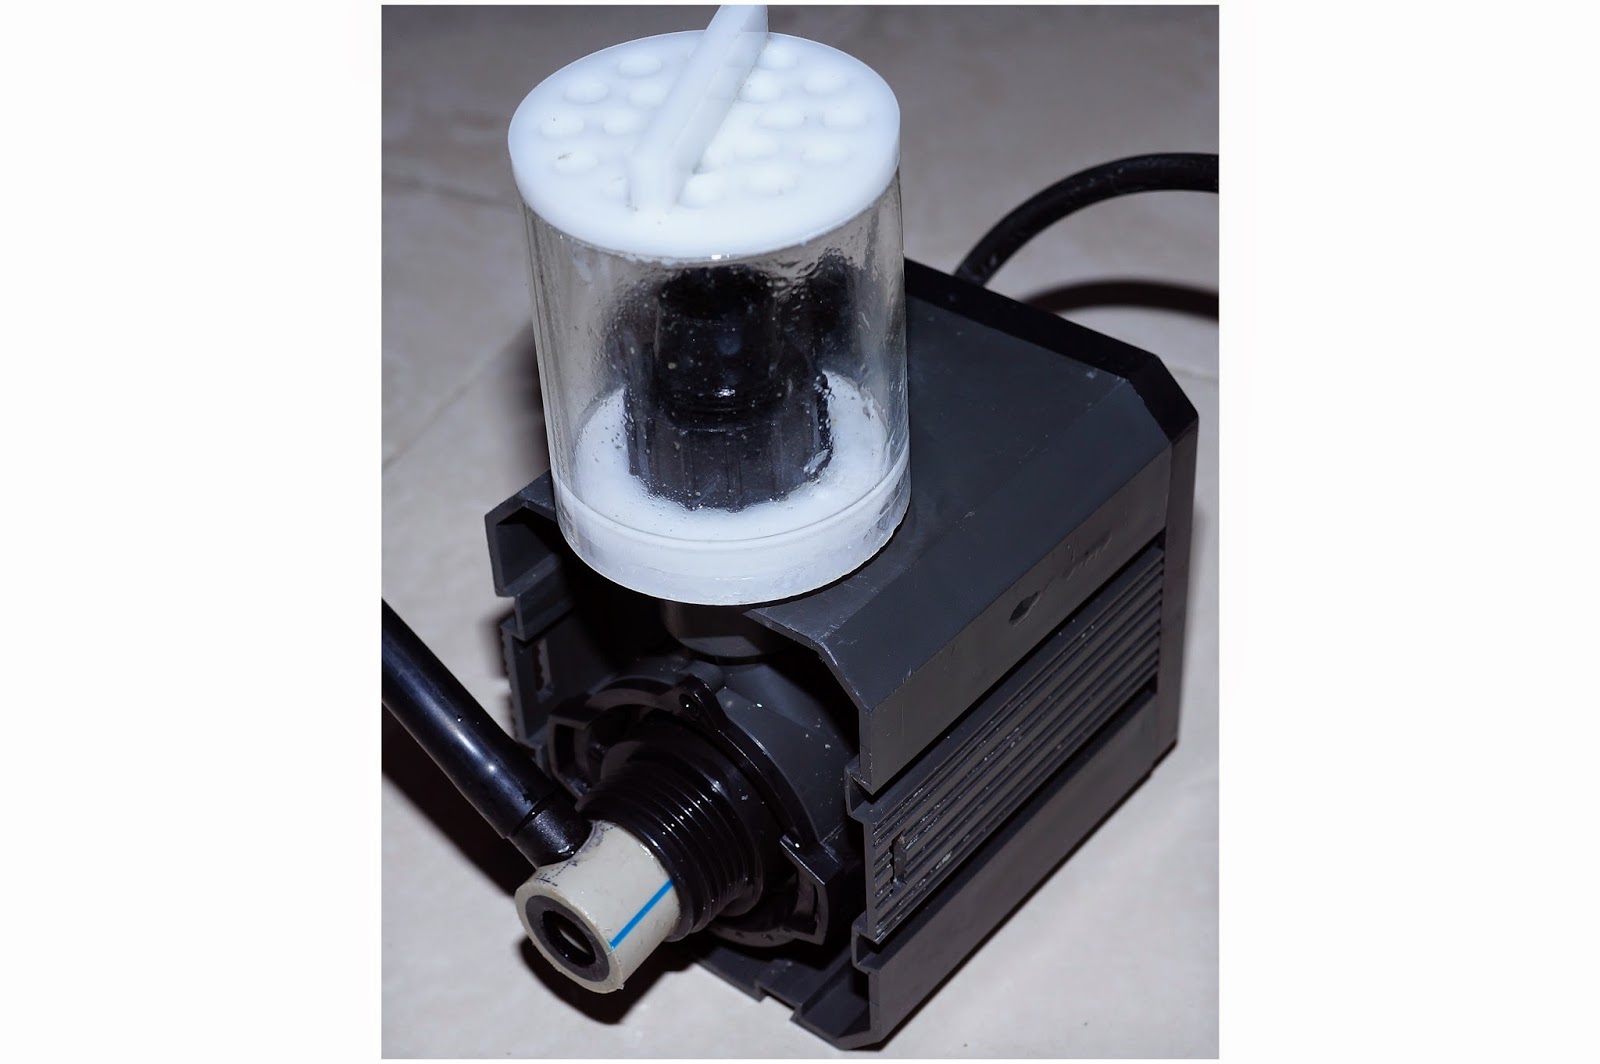
Most reefers like how coralline algae looks on aquarium rock, although not everyone wants the stuff covering their powerheads because it can eventually impact performance. Pump soaks free your pump/powerhead of unwanted coralline and dirt to make your pump look and run like new. Pump soaks, also referred to as accessory or equipment cleaner, decalcify aquarium parts faster than vinegar.

To use a pump soak, remove the pumps from your aquarium and soak them in a bowl or bucket filled with water and the equipment cleaner of your choice. You will begin to see algae dissolve from your pumps within minutes. They’ll be good as new in no time!

Check out my colleague Kira’s review on D-D EzeClean Equipment Cleaner for more detailed instructions and photos.

New Item Roundup: 4/28/14

$
0
0

EcoTech Marine Radion Wide Angle Lens Upgrade Kit
These replacement upgrade lens are designed to increase the spread of the Radion LED fixture to 36" x 36". Can be use with any generation of Radion XR30w LED fixtures. 2 lens per pack.


D-D AquaScape Aquarium Epoxy Grey - 4oz
AquaScape has been specially developed in association with Milliput for use within Marine Aquariums. Grey AquaScape Epoxy cures underwater to the color of natural stone, which makes it far more aesthetic than standard aquarium epoxy.


Red Sea Copper/Cu Test Kit - 100 tests
Red Sea’s Copper Pro Test kit accurately measures chelated and non-chelated Copper in salt and fresh water aquarium.


Red Sea Aiptasia-X Treatment Kit- 8.5oz (250mL)
In an exciting development for reef-keepers Red Sea has developed a unique patent pending formula to treat the pest anemones Aiptasia sp., Anemonia majano and Boloceroides sp. Affecting almost every reef aquarium, Aiptasia (otherwise known as glass anemones), are often introduced via live rock or corals and can quickly reach plague proportions in marine aquaria, destroying corals and other marine livestock with devastating effect.


UP Aqua D-522-3 CO2 Glass Diffuser
Glass CO2 diffuser with built-in bubble counter. High quality ceramic plate for atomizing CO2 gas for a higher efficiency diffusion rate.


Real Reef Live Shelf Rock
Works great for adding shelves to your existing or planned aquascape. Great for creating shelves to accommodate frags, clams and other marine life needing a flat surface. Made from the same all natural calcium based ingredients as Real Reef Rock and functions great as a natural filter or growing surface.


Mr. Aqua 32 Gallon Frameless Low Iron Glass Aquarium
Mr. Aqua aquariums are produced using high clarity glass with thicknesses ranging between 5mm to 10mm depending on the size. By eliminating the plastic frame that surrounds typical aquarium systems, the Mr. Aqua aquarium provides a clean and clear view of your aquatic life. This model is 32 gallons, measures 23.6" x 17.7" x 17.7", features low iron glass and an extra-fine silicone finish.


Mr. Aqua 12 Gallon Frameless Low Iron Glass Aquarium
Mr. Aqua aquariums are produced using high clarity glass with thicknesses ranging between 5mm to 10mm depending on the size. By eliminating the plastic frame that surrounds typical aquarium systems, the Mr. Aqua aquarium provides a clean and clear view of your aquatic life. This model is 12 gallons, measures 35.4" x 8.3" x 9.4", features low iron glass and an extra-fine silicone finish.


Mr. Aqua 53.4 Gallon Frameless Low Iron Glass Aquarium
Mr. Aqua aquariums are produced using high clarity glass with thicknesses ranging between 5mm to 10mm depending on the size. By eliminating the plastic frame that surrounds typical aquarium systems, the Mr. Aqua aquarium provides a clean and clear view of your aquatic life. This model is 53.4 gallons, measures 35.4" x 17.7" x 19.7", features low iron glass and an extra-fine silicone finish.

Kalkwasser: 10 Frequently Asked Questions

$
0
0


The life inside your reef aquarium is constantly using up the calcium in your tank water.

The rate of uptake varies from tank to tank—calcium usage largely depends upon the type of corals you keep in your aquarium.

Reef tanks that are predominantly filled with hard corals—like Acropora, Montipora and Euphyllia, for example—will have a much greater calcium demand than an aquarium filled with soft corals, such as leathers, mushrooms and xenia.

Fortunately, there are a few different ways we can replenish the calcium levels in a reef tank. One popular approach is by dosing kalkwasser (or simply "kalk").

We receive a lot of questions from hobbyists curious about kalk, so we put together a list of the most frequently asked questions to answer your inquiries and help you decide if using kalkwasser is right for you!


1. What is kalkwasser?

The description of Two Little Fishies Kalkwasser supplement mix defines kalkwasser as "the German term for limewater, a saturated solution of calcium hydroxide in water."

Calcium hydroxide—Ca(OH)2—is sold in a powdered form for aquarium use. Most of the top supplement manufacturers produce and package their own versions of kalk (you can check out reviews on our website). The purpose of dosing kalkwasser is to maintain optimal calcium and alkalinity levels in a reef aquarium.

To dose kalkwasswer, you must first mix the kalk powder with freshwater. This produces a clear liquid with some white residue leftover on the bottom of the mixing container. You can then dose/drip the clear kalk solution into your aquarium to help maintain calcium and alkalinity levels.


2. Should I use 2-part supplements, a calcium reactor or kalk to maintain levels in my tank?

There isn't a right or wrong answer to this question because every aquarium and tank owner are different. Kalkwasser is certainly an economical and easy-to-use solution: you can manually dose it, have it delivered via dosing pump or use a kalk reactor, each of which have different price points.


3. Can I use kalkwasser and a calcium reactor at the same time?

Without a doubt, yes. If your calcium reactor is having difficulty keeping up with the demands of the calcium consumers in your aquarium, dosing kalk can pick up the slack. Experiment with stronger and weaker kalk mixes so you can dial in the best dosing regimen for your tank to keep levels stable.


4. How do I dose kalkwasser? Is one approach better than another?

Here are another couple of questions that don't really have a right or wrong answer.

First and foremost, kalkwasser needs to be dosed slowly. Kalk has very high pH: if too much is added at once, you may raise the pH of your aquarium water to dangerous levels.

If you manually dose kalk, I suggest using ¼” tubing (like airline tubing) along with a valve to dial in a slow drip rate. You can siphon the kalk from the holding container into your sump or other area of high flow in the tank to quickly dissipate the mix within the aquarium. Another method is using a dosing pump (like an Aqua-Lifter) to drip the mixture in to your sump. Since you aren't relying on gravity to drip the kalk, the reservoir can be at the same level as the sump.

There are also kalk reactors available that can be used with auto top off systems or dosing pumps to help with dosing. A kalkwasser reactor is simply an inline chamber that stirs the kalkwasser solution automatically ensuring maximum concentration. You can easily connect these reactors inline with your automatic top-off or electronic dosing system.


5. Why should I dose kalk at night?

In a reef aquarium, you often see a swing in pH levels from day to night. pH levels are highest during the day and lowest at night. Dosing kalk at night helps you keep pH more stable. Does this mean it is bad to dose during the day? Not necessarily. You can dose kalk during the daytime but you will want to make sure the amount being dosed doesn’t cause the pH to rise too high.


6. How long after I mix up my kalk powder with freshwater can I use it in my tank?

This will vary depending how much you mix, but you will see a clear liquid within a couple of hours that is ready to be used.


7. Can I reuse leftover undissolved kalk powder or do I need to mix a new batch every time?

You can reuse it, but you may need to add a little more kalk powder to make up for what been dissolved and used. For best results, I recommend changing out your kalk about once per week. Most manufacturers discourage users from making more solution than can be used in one week.


8. How do I know how much kalk powder to mix with freshwater for my tank? How do I know if I am using enough/too much kalk? 

The simple answer is test your water. Monitor your calcium and alkalinity levels at a minimum while dosing kalk. Start with a lower amount dissolved (1/2 to 1 teaspoon per gallon) and monitor your tank's parameters over the next couple of days. If you are seeing a drop in the calcium/alkalinity levels, increase the amount of kalk used; if you are seeing a rise in the levels (beyond the levels you are trying to maintain) decrease the amount used.


9. Are there any downsides or possible negative effects from dosing kalk?

Due to the caustic nature of kalkwasser, it can cause major issues in your aquarium if overdosed. Specifically, it can raise your pH to dangerous levels. If you are dosing with a dosing pump or other automated system, you may want to use an aquarium controller to stop dosing in the event the pH level rises too high.


10. I have a nano reef—can I dose kalk?

We generally do not recommend dosing kalk in nano aquariums. Changes in water chemistry occur more quickly in nano aquariums due to their small size and using kalk could lead to a dangerous pH spike. However, if you're an experienced reefkeeper and feel dosing kalk is the best way to maintain your calcium and alkalinity, by all means proceed. My advice would be to try the minimum recommended amount first, if not slightly less. This will reduce the risk of dramatically altering your pH, which could have disastrous results in nano tank.


Have More Questions?

Hopefully you've found this list of frequently asked questions useful. Of course, if you have additional questions about dosing kalk in your own tank, we are more than happy to offer you free one-on-one support to help you get started on the right foot. Give us a call, hit us up on live chat or send us an email: we'd love to hear from you!

My First Saltwater Aquarium (at home): Part 2

$
0
0
After waiting… and waiting… and waiting… my aquarium is finally cycled after about 5 weeks.

Cycling is the killjoy of starting up a new fish tank. After you get all hyped up on the build, you’re forced to just sit and wait in the corner like a little kid. Being asked “When are we putting fish in?” i.e. “Are we there yet?” everyday by my wife and daughter doesn’t help either. Hoping to speed up the process, I put some fish food in and added little pieces of live rock.

The last stage of the cycle is when nitrate is produced as a byproduct. On the 4th week, I was hoping that it would be ready. I crossed my fingers and grabbed my Nitrate test kit but it turns out0ppm. Not what I was hoping for. This would have been awesome if I had an established tank, but I need some nitrate! Another week it is…

During this period, my mentor Robert (from our videos) told me to do a small water change. The first thought that came into mind was wouldn’t this hinder and prolong the cycling process? He confirmed my suspicions and said that removing substantial amounts of water during a cycle will only prolong the process.  However, my tank has been running for four weeks with no water removal and gas pockets in the sand bed gave us a strong indication that beneficial bacteria was present and processing waste. A small water change at this point would help ensure the water is clean and ready for animals in about a week.

Cycling tank w/ finished rockscape


I also added lights to the tank. I’m currently using a 36-48” Current USA Satellite Freshwater LED Pluswhich I inherited with the tank. Before you say anything, I’m aware that it’s the not the ideal light for a reef tank but it’s what I have at the moment. I definitely plan on upgrading it to a more suitable light in the near future.

Speaking of water changes, I got some feedback on my first post about how crappy my tank location is for maintenance work. I’d actually been warned beforehand and while I appreciate the concern, I’ve committed myself to just deal with it since it’s the best location in my home. I refuse to just stick it against a wall that would be more distracting than compliment a room. I must admit though, I did have my share of spilled water and lifting heavy buckets and jugs over the couches. And yes, I did hear whispers of “I told you so…” in my head.

To minimize this, I moved one of the couches farther away to create more space so now I can easily walk in and out. I also decided to use smaller jugs (2.5 instead of 5 gallon) and buckets so it’s easier to manage. Later on I plan on using a pump and tube combo to replenish the saltwater instead of pouring it in. I also find using an old blanket to cover the floor very helpful in cleaning up after doing maintenance.

By week 5, I suspected my tank was now ready and Robert agreed. Coming from someone who can measure salinity by tasting saltwater, I could have probably taken his word for it but decided to test my parameters anyway. Success! Now I'm excited to add a little life to the tank.

Since we’re in the process of moving the office tank (38 gallon Innovative Marine Nuvo) into a bigger 80 gallon Innovative Marine Nuvo SR-80, I was able to score some coral frags. I got a small rock with a bunch of mushrooms attached to it and a frag of bright green Sinularia (Mushroom Finger Leather Coral). Robert also gave me some birdsnest frags from him home tank.

Before I introduced the corals into my tank, I had to setup a better water flow system. At this point I was only relying on the built-in skimmer and 2 outlets of the Nuvo tank. I got a hand-me-down Koralia 2 x pump + wavemaker kit and I installed one pump at each far side of the tank. Like most hobbyists, I’d love to eventually get my hands on EcoTech Marine’s MP10 (when the budget permits).

I soon realized that placing corals inside your aquarium is not as easy as it seems. Besides arranging them in an aesthetically pleasing manner, I had to consider their light (yes, I know my light isn't appropriate quite yet) and flow requirements. I decided to mount the freshly fragged sinularia to a small piece of live rock. Of course, I forgot to bring home some glue. Good thing I watched the video about fragging soft corals and was able to use a rubber band (c/o my daughter) to mount it. BTW, the sinularia I have is a direct descendant of that sinularia in that video I just linked to.

Green Sinularia


As for the birdsnest, it came in a few pieces so I just stuck them together in a hole in the rock. The mushroom was the easiest; I just placed it on the sandbed. I was advised that they spread easily and I don’t really want them taking over a rock, therefore I isolated them (somewhat). For acclimation, I used the Reef Gently AccliMate.

Birdsnest Coral


Colored Mushroom Rock


It didn’t take long for the corals to open up and start showing some colorYes! I didn’t kill them! My loyal sidekick (daughter) was with me all throughout the process but it didn’t really excite her as much as a clownfish would. At least there’s officially life in the tank now!

Like Pringles: once you pop, you can’t stop… I already felt the urge to get more corals. I know it's unwise to add a bunch of animals right away, so I planned to pick up just a few corals and a cleanup crew. I’ve always been an admirer of ricordea, so I’m bent on getting some for sure. I’ve been envisioning my tank to be some sort of ricordea (flower field) farm wherein a big chunk of live rock is just full of colorful ricordea. I also want a coral (e.g., torch coral, hammer coral, etc.) that would possibly have a symbiotic relationship with my future clownfish. I’m open on this one and I’m a little hesitant on anemones since I’ve heard they’re not for beginners. I’m pretty open on the cleanup crew as well, as long as they’re not the type that would easily knock off corals.

I went to a LFS (local fish store), Reef Raft USA. They had so many corals it was  overwhelming. But of course, I needed to stick to the plan and get out of there as soon as I could before maxing out my credit card. I had to develop tunnel vision to keep me away from the pricey specimens. Stick to the plan, I kept telling myself. Thank goodness for self-control. I ended up getting: 2 ricordeas (1 orange; 1 green) and a branching hammer coral. For the cleanup crew, I got: 1 cleaner shrimp; 3 nassarius snails; 1 astraea snail; 2 hermit crabs.

 Branching Hammer Coral

Ricordea Florida


Robert gave me a heads up on how inverts are very sensitive and they need more care in acclimating. I put both the inverts and corals in separate containers and poured tank water in little by little. Arranging the corals didn’t seem as challenging this time. A little research on the lighting and flow needs helped as a guide. I also came prepared this time with E.S.V Zap glue. I was impressed by the thickness of the glue and how it works underwater. I had the scape ready in no time. When I turned on the moonlight that night, I was completely amazed by all the vivid colors in the tank. They literally glow-in-the-dark. I need more ricordeas!
  
24 gallon Nuvo tank w/ moonlights on


 Glow-in-the-dark Ricordeas


Sinularia under moonlight


After the high of adding livestock to the tank, I had to ensure to keep my new inhabitants happy. I added Seachem’s Phosguard in the system to keep phosphate levels in check. I also started dosing trace elements (Kent Marine) and a 2-part calcium supplement (E.S.V. B-Ionic)Robert kept stressing that I need to test the calcium levels besides nitrate and phosphate levels. Good thing I did because because they were low. 

The last installment of livestock (for now…) includes a Bluespotted Watchman Goby, Tiger Pistol Shrimp and a Green Pocillopora. They were up for adoption from Robert’s tank which he had to take down because he’s moving. Since they were endearing to Robert, there’s pressure to keep them alive and healthy. It did require me to take an oath to make sure they’re provided the best possible care.

Once the goby and pistol shrimp were acclimated in the tank, I noticed they act like inseparable BFFs. They dug a hole under the rock and made it their common hideout. I could picture them putting up a sign saying “Home Sweet Home” on the wall. I thought it was weird and then I looked it up and apparently they develop a symbiotic relationship similar to a clownfish and an anemome. The goby acts as the pistol shrimp’s “watchman” since it has poor eyesight and the shrimp protects the goby from predators. Pretty cool!
  
 Cleaner Shrimp and Watchman Goby

 Green Pocillopora under moonlights


It’s nice to finally have a fish in the tank but the goby spends most of its time hiding with the pistol shrimp. I only get to see them from afar. Once I close in, they immediately run for cover. Even when I feed them, they don’t come out until I’m nowhere to be seen (so they think…). I definitely need more lively specimens in my tank. Nothing beats a clownfish for newbies like me! Besides, I promised my daughter we’ll get a “nemo” fish. I’m also thinking of getting a six line wrasse because they look badass. Or maybe a blenny? I really like the unique way they swim. Did I mention I want more ricordeas?

Read: My First Saltwater Aquarium (at home): Part 1

LED and T5 Hybrid: My Ultimate Lighting System

$
0
0
Being one that loves to tinker with my reef tank, I am ALWAYS looking for ways to make my tank better and my fish and corals “happier”. Whether it is a new filter, a new light, new additives or a new food, I am always looking for something better. Talking to other hobbyists as a part of my job and being surrounded by co-works that are just about as obsessed as I am definitely do not make things any easier.
After taking the EcoTech Radion Gen 3 LED fixtures for a test drive, I was extremely impressed and knew I ABSOLUTELY had to have them. Wanting to go above-and-beyond ‘for my corals’, I decided that four additional 54W ATI T5 bulbs were required for my “ultimate” lighting system. 
The Radion fixtures are used as the main lighting system and are on for 10 hours a day. This allows me to save on electricity during most of the day by utilizing the efficient LED’s and allows me to set up a gradual dawn/dusk effect and have that amazing fluorescence and shimmer that the Radion LEDs produce. 
The four T5 bulbs are on for four hours per day to help further enhance the colors and growth of the corals. The shorter photoperiod for the T5 bulbs should help extend their life past the typical 8-10 month period. By creating this “hybrid” lighting system, I am able to get the both world: the great features, controllability, fluorescence and efficiency of LED lights and the proven color-enhancing performance of T5 bulbs.
Once the decision was made and all the supplies ordered, it was time to head into my work shop and make it all happen. The final design included a short wooden canopy housing the four T5 bulbs with an open center channel that the two Radion fixtures sit on. The four T5 bulbs consist of 2 ATI CoralPlus and 2 ATI Blue Plus bulbs running on an AquaticLife T5 retofit kit and parabolic reflectors.
The short canopy was made to easily slide into my existing AI RailKit and elevated to allow easy access into the aquarium for maintenance. Having the Radion fixtures sitting on top of the canopy (as opposed to being inside) allows heat to freely dissipate above the canopy. The open channel also allows me to slide the Radion fixture back and forth to get the perfect placement for my aquarium.
On a side note, I found a Copper paint with a Hammered texture by Rust-Oleum while cruising the aisles at Home Depot. Having built numerous aquarium hoods and stands in the past, I have had a fair amount of wood-working experience. However, my wood-working skill is far from furniture grade. This paint produces a hammered texture that hides just about all the imperfections and looks surprisingly natural. The paint was also thick enough to fill in any small cracks and gave the hood a much nicer, finished, look than it would have with regular paint.
My new “ultimate” lighting system has now been running on my aquarium for over a month and I am definitely delighted with my decision. I am able to get the controllability, shimmering and fluorescence of the LED lights and corals seem to be responding well to the T5 supplemental bulbs by being as vibrant as ever. 
Many of my brown or green acros have started to develop very nice coloration. I can't wait to see how these acropora corals will look in 6 months. My urge for tinkering with my reef tank has been temporarily satisfied… until next time….

How to Measure Salinity in a Saltwater Aquarium

$
0
0

It goes without saying that salinity is the most fundamental parameter in a saltwater aquarium. Without salinity, it isn’t saltwater.

Yet, perhaps precisely because salinity is such an important parameter, it is often overlooked. This article will explain what salinity is and why it is important to measure salinity. Then, we will discuss what your salinity level should be, and how to test for it.

Salinity is the measure of dissolved salt content in water. Salinity is typically measured in parts per thousand (ppt) or specific gravity (sg). The more salt in your water, the higher your readings will be. Saltwater aquarium salinity is usually kept between 1.020-1.028sg. Some aquarists like to keep fish only aquariums at lower levels (1.017+) to keep salt costs low and to reduce problems with parasites, which don’t survive as well in lower salinity.

Many reef aquarists like to maintain salinity at higher levels, sometimes as high as 1.031 because salinity tends to be higher around a reef. Choose what is right for your aquarium, and make sure it stays stable. An auto top off systemcan alleviate your troubles if evaporation is causing your tank to fluctuate a lot day to day.


Salinity should be checked very regularly. Oceans are very stable environments, where there is not a lot of day to day change in the water parameters. Fish can respond negatively to even small changes in salinity. So, if you have let your salinity get out of whack, make gradual changes. Then, redouble your efforts to keep everything steady.


The most economical way to measure salinity is a hydrometer. There are two basic types: glass models and plastic boxes.

A glass hydrometer floats in the water. The glass tube will sink to a certain level, depending on the density of the water. You then read the measuring line on the tube. If you use one of these models, please do your testing outside the tank. Water flow makes it impossible to measure accurately in the tank. Beyond that, glass breaks. You do not want a broken hydrometer spilling glass and innards into your precious tank. Fill a drinking glass with tank water and test that way. Twenty years ago, glass hydrometers were the standard, but are rarely used anymore.


A box hydrometer is a plastic device with a swing arm in it. When the box is filled with saltwater, the swing arm rises to a certain point, depending on the salinity. Box hydrometers are inexpensive and easy to use, but often inaccurate. If the swing arm is corroded or has dried salt on it, the measurement may be off. Most boxy hydrometers cannot be calibrated. When you are looking for stability and accuracy, this can be a problem.

As you can see, the low cost of these models comes with a price. You will not find many dedicated hobbyists who rely on these devices. With what we pay for livestock, a good refractometer can pay for itself with one prevented death.


A good refractometer is a precision instrument for measuring salinity. Without getting technical, a refractometer works by measuring how much light “bends” as it passes through the water. As the salinity in the water changes, so does the angle of the refraction, or “bend.” Be sure you are buying a refractometer made for measuring salinity in a saltwater aquarium. Refractometers can be used to measure any number of things, and are calibrated depending on what they were manufactured for.

When you buy a refractometer, and periodically afterwards, you should check the calibration of your instrument. You can use salinity calibration fluid,  or you can use distilled or RO/DI water, which should measure 1.000sg. When purchasing a refractometer, you may want to consider a unit with automatic temperature compensation (ATC). Specific gravity changes depending on temperature. A unit with ATC specifically made for aquarium use will be the most accurate choice.


To use a refractometer, place a few drops on the glass plane and then place the clear cover over the sample. Point the refractometer at a bright light source, like your tank. Look through the eyepiece in the back to get the measurement. Your salinity is wherever the colored half of the viewfinder stops.


Now, if looking through an eyepiece feels a little too 20th century for you, then you might want to consider a digital refractometer. Digital refractometers work on the same principle as mechanical models, but are more precise. A digital refractometer can also provide readings in the newer standard Practical Salinity Units (PSU) as well as PPT and S.G. You simply drop a sample in the test well on the unit, and it reads you back the salinity. These models are highly accurate and are not significantly more expensive than mechanical models.


There are other digital devices to measure salinity as well. For example, a conductivity meter will measure how conductive saltwater is. You can purchase hand held units like the Tunze Conductivity Monitor. Or, if you have an aquarium controller, you may be able to add a salinity probe. This is a great choice for the dedicated hobbyist. Not only are you able to spot check the salinity level, but you can measure the change over time so that you can ensure everything is stable.


So, there you have it. Salinity is a key parameter to measure for in a saltwater aquarium. Salinity should be one of the first and most frequent tests you do on your saltwater tanks. As always, if you have any questions one of our team members is always happy to assist.  

Chemi-Pure Blue Review: Blue is the New Black!

$
0
0

Most hobbyists are familiar with the Chemi-Pure Elite filter media sold in black jars—many of us use it in our reef tanks to keep aquarium water cleaner and clearer. It is extremely convenient and long-lasting compared to standard chemical filter media.

Newly released from Boyd Enterprises is Chemi-Pure Blue. This new Chemi-Pure media is designed specifically for saltwater reef and fish-only aquariums.

In addition to high-grade low-dust pelletized carbon, it also includes premium high-capacity ion-exchange resins (instead of GFO like in Chemi-Pure Elite). This resin mixture does a great job removing dissolved organics, phosphates and silicates. It also raises redox, stabilize pH and removes coppers, metals, odors, medications and dissolved metals.


Natural materials work better in certain applications, like food flavoring or real versus imitation crab. Sometimes, the ‘fake’ stuff works better than ‘real’ stuff—such as synthetic motor oil, wood versus graphite fishing rods—and in this case, synthetic resins versus natural media.


I was surprised to see just how much resin is contained in a single jar! While competing products consist of mostly carbon and a small amount of resin, Chemi-Pure Blue has A TON of resin. Being aware of the high costs of these synthetic resins, I am very glad to see that Boyd formulated this new blend based on effectiveness rather than cost.


The small 5.5 oz jar of Chemi-Pure Blue is rated for aquariums up to 35 gallons, which is perfect for my 34-gallon Solana. There is a larger 11 oz jar for aquariums up to 70 gallons. If your aquarium is larger than 70 gallons, you can simply use multiple jars.

Chemi-Pure Blue has been doing a great job keeping the water in my nano reef aquarium crystal clear for the past few weeks. One bag of media can last up to 4 months (depending on your bio-load and water quality), so it is also economical.

If you are looking for the best, single, all-in-one chemical filter media you can use for your saltwater aquarium, I would seriously recommend giving Chemi-Pure Blue a try!

for those that read my previous blog... yes, I had leftover paint,
so my Solana stand and light hanger both got new paint jobs!

Product Review: Innovative Marine Ghost Protein Skimmer (FullSize), Part 1

$
0
0

Innovative Marine Ghost Protein Skimmer - FullSize rated up to 120 gallons (Item #: 0I10452) 

This skimmer is now available for pre-order, reserve yours today! Expected to be in stock 5/19!

Features
  • Recirculating Design – Passively recirculates bubbles for maximum dwell time
  • Drop-In Convenience – Preset to optimal water level and eliminates the need for extra accessories.
  • Enlarged Air Silencer Box– integrated into the skimmer’s body for a seamless look while reducing noise.
  • Bubble Plate Diffuser – Reduces turbulence inside skimmer to improve skimmate production
  • Adjustable Air Valve – Provides air intake control
  • Needle Wheel Impeller – Produces dense micro bubbles
  • Cup Drain Elbow – Prevents overflows
  • Airline Management – Keeps airline organized and “kink free”
  • Suspended Pump Design – Reduces vibration by suspension
  • Self-Draining – Eliminate messy maintenance
  • Low Profile Cup Design – Keeps your skimmer hidden from view
Specifications
  • Dimensions: 5.39” x 3.74” x 14.57”
  • Tank Capacity: 60-120 gallon
  • Designed For: SR-60, 80 & 120
  • 110-120V/60HZ
  • 24 watts
  • Flow Rate: 370 GPH
The great guys at Innovative Marine were generous to pull this skimmer directly out of their running SR-120 aquarium for us to test and review! They literally took it out, put it in a bucket and was like, here you go! Please excuse the skimmate residue in these pictures as I wiped down as much as I could.

This is a pre-production model so there will be some changes when the retail version ships (the pump will have a ceramic shaft, for example). I often get asked many questions about these skimmers that isn't printed in the user manual or anywhere else online. My goal is to gather as much information as I can and share it with you all.

We all know that these are designed for Innovative Marine Fusion and SR Series aquariums, but many hobbyists want to know if it will work for their tank, too? Questions such as what the minimum and maximum water level depth is required, and what is the ideal water height that works best? Will the fluctuations of water evaporation greatly effect its performance? How easy is it to adjust and does it skim well? How much clearance do I need to remove the cup and is it quiet?

All of these will be answered in Part 2.

In Part 1, we will be going over the physical part of the design and components. So let's get started!


Rated up to 120 gallons and designed for the SR-60, SR-80 and SR-120 aquariums. The dimensions of 5.39" L x 3.74" W x 14.57" H listed by the manufacturer does not include the skimmer cup. They are the measurements of the white body only. My first impressions is that the skimmer felt solid and looked pretty good.  The built-in silencer and airline management is unique and a nice touch.

Measurement of the overall height of the skimmer with the cup pushed in as far as it will go for a wet skim.

Approximately 16.0625 inches tall

One thing to note for skimmers with this design, it is normal for the skimmer cup to be smaller than the hole in the body as the red rubber o-ring holds the cup in place. 

Pro-Tip: If water is leaking from the sides of the cup where the o-ring is at and it is making a big mess, then you have the cup too low!

Measurement of the overall height of the skimmer with the cup at its highest point for a dry skim or to prevent the cup from filling up too quickly.

Approximately 18.625 inches tall

Skimmer collection cup with drain fitting elbow. The total height of the skimmer cup with lid is approximately 4.5 inches. Clearance needed to remove the cup from the body would be approximately 19.07 inches. This would be a great little skimmer for a sump in a short cabinet stand.

Inside the body of the skimmer with the pump removed is pretty hollow

Needle wheel impeller installed with the cover removed

Another view of just the needle wheel impeller with a metal shaft. We have confirmed that the production model will have a ceramic shaft.

370 GPH, 24 watt pump with the bubble plate, and volute/venturi connected

Performing maintenance on the pump will be easy with this design. The pump is held by the bubble plate diffuser.  Place the pump underneath the body and screw on the bubble plate diffuser to secure it into place.  As you can see the bubble plate takes very little space maximizing the entire body for microbubbles.  There are no supports or braces inside the body allowing you to reach all the way to the bottom.
Stay tuned as I test the skimmer in Part 2!

Aquascape Eye Candy - 11 Examples for Inspiration

$
0
0
We all know by now that rock and (to a lesser extent) sand is the basis of filtration for any reef system. But for many of us, it's not enough to just throw some stuff in to a tank. We're addicted to the artform of aquascaping.

I called on the folks over at Nano-Reef.com to show off their aquascapes and we found some beauties. The great part about these nano aquarium aquascapes is that you can simply build them bigger or combine your favorites to build the 'scape for your larger reef tank.

So without further ado, here's a list of eleven incredible aquascapes, from rock walls to lagoons and everything in between.


Two Islands and a Trench


Lots of open space and multiple heights for coral placement make this a favorite of many reef addicts.  That's one happy clownfish!

via Smithjm5

Tonga Branches 


Waters of the Tonga area are known for two things - shelf rock and branches. This scape does an amazing job of recreating the natural look of the Tonga in a shallow reef.

via plainrt

Arches and Towers


I can't overstate how big of a fan I am of arches. But this aquascape takes things a step further with a huge, vertical reach of two pillars and an arch to combine them. Absolutely beautiful.

via BattleAthletics


Bommies


Bombora, or bommies, is an Australian term for waves that break over a shallow area of a reef. This minimalist scape does an incredible job of showing off just how beautiful those bommies can be.

via spazizz

Dual Trenches


Like the islands and trenches scape from above, this build focuses on an expansive sand bed and loads of places for corals to call home. Kudos on the use of the black sand too!

via Pinner Reef

Single Arch


This single, massive arch plays in contrast to the trench and island aquascapes that we've seen before. Also, the lack of a vertical pillar makes the arch the true centerpiece of the tank.

via ConnorFood

Three Pillars


While it might break everything about the "rule of thirds", this tri-pillar design is as beautiful as it is functional. Oh, and it doesn't hurt that it's absolutely packed with quality corals.

via TJ_Burton

Three Islands (and a Bonsai!)


This unique take on the island idea uses hammer corals and frogspawns to create the coral version of a bonsai tree. Lovely!

via Felicia

The Rock Wall


If you've ever had the pleasure of diving around a reef shelf, this will look very familiar to you. Although we don't normally see corals on the walls in the ocean, this scape gives lots of room to grow corals that need different levels of light.

via HVani

A Shallow Reef


The beauty of a coral reef is that it's rarely ever one shape. In this aquascape we see towers, shelves, arches and a lagoon structure, all rolled into one view. An absolutely stunning example, and all hand crafted using dry rock.

via jedimasterbean

Ultra-Minimal Lagoon


I saved this one until the very end because it's absolutely the most beautiful aquascape I've ever seen. I'm a fan of minimalism, and this ultra-minimal lagoon manages to evoke feelings of serenity before any corals are even added to the tank.

Multiple, smaller pieces of rock built up and buried, combine to form what I can only describe as perfection. Well done indeed.

via Mr.zissou

My DIY Hood for T5 & Radion LED Lighting

$
0
0
This is a follow-up to my post from last week, LED and T5 Hybrid: My Ultimate Lighting System.

I received a lot of requests for more info on my DIY hood that houses 2 x EcoTech Gen 3 Radions and 4 x 55W ATI T5's, so I thought I'd address those topics in today's post. Many thanks to everyone for reading and for your questions/comments!


The hood measures roughly 20" x 50" x 3". Rather than constructing the top with a solid piece of wood, I decided to use two 6.5" x 48" long strips (1/2" thick birch) that are connected with three horizontal strips. Constructing the top this way made it easier to create the center "cut-outs" for the LED's. Additionally, it also made it made the top of the hood look more structurally appealing.

The center channel measures 6" wide so the Radion light pucks can shine through the hood without obstruction. A couple of quarter-round rails were placed next to the open channel so the Radion fixtures will sit in the channel snugly. Ample amount of wood glue and finishing nails were used to make sure everything is rock-solid!

Once the top panel was done, it was time to attach the sides. 2.25" wide trim (typically used for door frames) was glued and nailed to the top panel. A small amount of wood putty was used to filled in all the gaps and a bit of light sanding prepped the hood for paint.

Next comes three coats of Rust-Oleum Copper Hammertone paint. Inside of the hood was painted black for aesthetics.

Once all the paint has dried, it was time to install the T5 components. AquaticLife T5 reflectors were mounted inside the hood along with the AquaticLife T5 retrofit kit (which includes a ballast with pre-wired endcaps to make things easier) and four ATI 48" T5 bulbs (two Blue Plus and two Coral Plus bulbs).

Six screws were mounted at the top of the hood to allow the hood to easily side in to the rails of my existing AI Rail Kit.

With the hood in place. The Radions simply sit in the open channels. With the width match that of the Radion, everything stays in place securely and I don't have to worry about my 'fancy' lights falling into the water. The open channels were purposely made longer than the lights to allow for ventilation and to allow me to position the Radions to exactly where I want them.

The final steps involves cleaning up the wiring and programming the lights through EcoSmart Live.

With the new lights installed, the corals are happy as ever. Many of my brown SPS corals are starting to develop some vibrant colors. I can't wait to see how these corals are going to look in 6 months!

With all my tools out of storage, I figured that it was time to tackle the fence in my front yard that I have long been procrastinating on building. It turned out to be black and brown, much like my LED/T5 hood... coincidence? Probably not!

Product Review: Innovative Marine Ghost Protein Skimmer (FullSize), Part 2

$
0
0
Welcome back to Part 2 of my Ghost Skimmer review. Miss Part 1? Read it here.

The skimmer has been running for over a week now in a controlled testing environment so here is my progress!


I'm testing this new skimmer in a 10 gallon tank without any livestock for a controlled environment. This is a simple barebones aquarium with just the Innovative Marine Ghost Protein Skimmer (FullSize) and a Tunze 6015 powerhead pump for water circulation. I used dirty water from my 75 gallon reef after a water change to fill up this tank.


I compared the Ghost Skimmer to my SWC 160 protein skimmer that I am using on my 75 gallon reef tank. I prefer to run my skimmers more wet compared to other hobbyists so I can pull out dissolved organics more quickly.


I wanted to measure how loud these skimmers are, so I downloaded the Sound Meter app on my Android phone to compare them. While this won't be the most scientific and accurate reading compared to an actual sound metering device, it worked well enough for a quick comparison test. My baseline room ambient noise reading came out to be 59 dB.


I made sure I turned off my return and reactor pumps before taking this reading. This is the measurement with my SWC skimmer at 66 dB


I had to use flash to be able to see the Ghost Skimmer so please excuse my blown out image. Next to the Ghost Skimmer I was getting a 68 dB reading. While it is louder, the skimmer has gotten quieter as it broke in. The pre-production skimmer has a metal shaft which I believe is making the impeller a little louder than it should be. I have requested the new ceramic shaft from Innovative Marine which I will hopefully get to test soon.


I've been pouring skimmate from my reef tank which has sped up the break-in process.


I started with my water level at about 11 inches which I think is close to what the Innovative Marine SR aquarium baffles are set at. The skimmer recently broke in so I will continue testing at this height to see if I can get dark and light skimmate after adjusting the height of the skimmer cup.


The skimmer is foaming pretty well. It took about a week until I got this thicker froth.


The foam has started to rise in the center column of the skimmer cup. Since the skimmer just broke in, I have the skimmer cup set at its lowest point.

Stay tuned for my final follow up post on its performance with the skimmer cup set at different heights, simulations with slight water level changes from evaporation, and reducing the overall water level to 6 to 9 inches which is the standard in most sumps.

2 Days Left: Win Chemi-Pure Blue Filter Media!

$
0
0

We are giving away containers of Chemi-Pure Blue to 5 lucky hobbyists to celebrate the release of Boyd's new all-in-one filter media!

Chemi-Pure Blue contains a proprietary blend of premium, low-dust pelletized carbon and high capacity ion-exchange resins skillfully combined to create a superior filter media for marine and reef aquariums.

Chemi-Pure Blue reduces organic compounds and phosphates while raising redox and helping stabilize pH for a healthy, crystal clear aquarium.

There is no purchase necessary to enter or win. Just sign up for our email newsletter!

Registration ENDS at 11:59 PM PST on 5/23/14.

Details: Open to U.S. residents 18 years or older. Void where prohibited or restricted by law. Winner will be contacted via email.

Biopellets - A Beginner's Guide

$
0
0
Biopellets have been around in the reef aquarium hobby for the past 5 years or so. But a lot of mystery remains when it comes to figuring out what they do, how they do it and the best practices for using them. 

In line with my "Reef it Simple" philosophy, I wanted to break down the confusion around biopellets and answer some questions that you're almost sure to have. So without further ado, here's your introduction to biopellets in the saltwater reef system.

What Are Biopellets?


Biopellets are a biodegradable polymer that is made from bacteria. They act like steroids for the beneficial bacteria in your system. You want a strong colony of this bacteria because it naturally controls the nitrates in a tank. Corals need some small levels of nitrates and phosphates to thrive. But too much of either can lead to problems like coral death or algae bloom.

Biopellets provide an ideal environment for beneficial bacteria to thrive. By pumping water from your system into a biopellet reactor we are creating a controllable, food-filled house where bacteria can live and reproduce.

Biopellet Alternatives


Biopellets provide a source of carbon, but not carbon like the media that we use to remove toxins from the tank. This is carbon as in the building block of life. Because we're feeding the bacteria, you can choose to use some other form of food.

Vodka dosing, carbon additives (such as Red Sea NO3:PO4-X ), sugar and even vinegar are all ways to add carbon. Adding these elements to the system in a broadcast manner can turn the entire tank into an ideal environment for the bacteria. The potential drawback here is that it's less controlled than a reactor.

Should I Use Biopellets?


If there are so many alternatives to biopellets, why would you use them? One reason is that biopellets are so highly effective at lowering nitrates that (when used with heavy protein skimming) the hobbyist can often stop using granulated ferric oxide (GFO). Unlike GFO, biopellets only need to be "topped off", rather than changed out completely, as they are consumed by the bacteria. This lets the hobbyist do less work (and save a bit of money) while enjoying a crystal-clear water column and healthy livestock. A biopellet reactor also confines the majority of the bacteria to a single area. This allows more precise control over the effects that the bacteria will have on the system.

Hobbyists will see the best performance from using biopellets on systems that have a heavy biological load. Those of us who have a lot of fish or tend to feed heavy (or a mixture of both) have probably dealt with problems that this can cause. A bloom of algae or cloudy water, as well as less-than-ideal growth from our corals are common effects from heavy stocking. 

Avoiding Biopellet Problems


Saying that biopellets have problems is a bit misleading. In almost every case that I've seen where people have problems, they come from couple of specific issues:
  • Using the full amount of biopellets from day one, causing a sudden drop in levels, leading to system shock.
  • Not having an effective protein skimmer to remove excess waste from the water.
So if those are the two problems, how do you avoid them?

It's important to remember the biggest rule of saltwater aquariums - stability is key. Hobbyists tend to run into problems when they "chase numbers" and make drastic changes rather than providing a stable environment. Because biopellets are used to control levels, it's easy to get into the bad habit of looking for perfection.

Getting Started With Biopellets


What we're aiming for is a gradual reduction of nitrates. To do this, we need to start with 1/4 or 1/2 the recommended "total dose" of biopellets in the reactor. Set your pump to gently tumble the pellets in the reactor. If they are allowed to be stationary, they can stick to one another. Allow the bacteria a couple of weeks to colonize the pellets, and make sure that you're using an accurate test kit every few days.


After a couple of weeks have passed, and your level drop starts to plateau, add another small amount of pellets. Again, we're looking for a slow decrease. Keep testing your water and looking for another plateau. It has been my experience, and I've heard from other successful biopellet users, that a nitrate level of 0.5 and a phosphate level of 0.03 to 0.05 is fairly ideal. As you approach these numbers, slow the level of pellets that you're adding. Once your tests show these levels consistent, turn off your reactor and mark the level of the pellets so that you know when to refresh them and how much to add.

The other important point here is skimming. As the bacteria consumes the pellets, a "film" of sorts will be produced. This film has a history of causing a cyanobacteria outbreak. (If you care about the technical aspect of why this happens, look for an explanation at the end of this post.) In order to make sure that this doesn't happen to you, you'll need to skim off this waste from the water coming out of the biopellet reactor. Hobbyists have had great results from placing the output of the reactor near the input of the skimmer, but some have even gone so far as to plumb the output line of the reactor to the skimmer. This ensures that absolutely all of the water coming out of the reactor is skimmed before returning to the system.

Finally, don't change your behavior just because you've started using biopellets. One pitfall is that people believe that they need to increase the feeding or population in order to give the system enough "food". But if we're starting from a known point on our nitrate and phosphate levels, we need to keep those levels the same in order to know how much we're reducing. If you want to feed more, or add a school of chromis, do so after you've established your biopellet level and then adjust as necessary.

Though biopellets can seem like a bit of aquarium magic, they're really very simple. We just have to make sure that we're looking at the whole picture instead of focusing on one specific area. By moving slowly, testing religiously and skimming effectively, you too can have a pristine tank with biopellets.

Warning: Technical Mumbo Jumbo Below This Line

Biopellets are often marketed as a nitrate and phosphate reducer, but that's only partially true. There are different organisms that will feed on nitrate versus the ones that feed on phosphates. Biopellets tend toward the reduction of nitrates by boosting the organisms that feed on them. Phosphates will naturally reduce by a certain amount in relationship to the reduction of nitrates. That is somewhere around a 16:1 ratio, whereby a reduction of 16 parts of nitrate will see a reduction of 1 part of phosphate.

With biopellet systems, we're reducing nitrates at a level faster than we can reduce phosphates. Nitrates will often become undetectable when using solid carbon dosing such as what we are accomplishing with biopellets. The remaining phosphates, then, become food for cyanobacteria if it is not skimmed from the water column.

It is imperative that the hobbyist remove phosphates from the system at a level that matches that of the nitrate reduction. This can be accomplished via water changes, but it's certainly not the most effective or simple method. While biopellets can replace the need to run GFO in a system, GFO is a considerably more effective phosphate reducer. However, by over-skimming (or boosting effective skimming via the direction of reactor outflow to skimmer intake), many hobbyists have found it unnecessary to continue the use of GFO in a system with biopellets.

The Intrusive Butt Fish

$
0
0
The most easily recognized symbiotic relationship in the marine world include clownfish with anemones and Gobies with Pistol Shrimps. Both animals benefit from a partnership, both have roles to play.

There are a few symbiotic relationships that are oddities. One of them is the Butt Fish.

Encheliophis homei.

Better known as the Silver Pearlfish, (although better remembered as the Butt Fish), these guys are long, skinny, eel-like fish that use a cucumber's hiney to get comfortable. Yup, they use the arse of the cucumber as a home. They lounge in these host quarters by day and come out at night to feed on small crustaceans.

This odd pair is rare in the hobby, but aquarists can find that the fish has hitchhiked in their tanks inside the unmentionables of the cucumber they purchased. Imagine explaining to your kids what the new fishy is doing.

So what do they do in there?

It is thought that they reproduce in the cucumber in addition to making it their habitat. Some species of the Pearlfish are not content by the protection their host offers, and are parasitic to the point of eating their hosts genitalia. It is not uncommon to find a PAIR of Pearlfish living inside Mr. Cucumber's bottom.

The odds of keeping the Pearlfish alive long term in the home aquarium is thought to be possible only with a cucumber host alongside with it.

Check out this video from Emmy Award-winner Richard Fitzpatrick:

Marine Depot is Hiring!

$
0
0

CUSTOMER SERVICE REPRESENTATIVE
Candidate will join the front line of our business and engage with customers on a daily basis. Primary duties involve problem-solving and providing accurate information to customers in a professional and friendly manner. Customer Service Representatives are responsible for providing accurate information about the specifications and proper use of the aquarium products available on the MarineDepot.com website as well as responding to customer email and phone inquiries regarding shipping, order tracking, returns, order status and site navigation.

Qualified Candidates Should Possess
  • Saltwater reef and fish experience
  • Excellent verbal and written communication skills
  • An outgoing, positive attitude about providing superior customer service
  • Computer literacy
  • Ability to share your knowledge
  • Multi-tasking capabilities
  • Experience working in a problem-solving capacity
Duties and Responsibilities
  • Assist customers with a positive shopping experience
  • Ensure the competence and development of your colleagues
  • Work with the Customer Satisfaction Index to benchmark and improve our service execution
  • Respond to and resolve customer issues with urgency
  • Ensure implementation and development of the Family Friendly Concept
  • Assume responsibility for projects and tasks as they occur
If you're interested in joining our team, please email your resume to hr-csr@marinedepot.com for consideration.

ABOUT US
MarineDepot.com is a fast growing online aquarium supply company located in Garden Grove, CA. We're looking for smart, creative people who will give 100 percent. Ideal candidates must be dedicated, detail-oriented team players that will thrive in a fast-paced, high-volume ecommerce work environment. The office atmosphere here is low-key, casual and collaborative. We have regular company BBQs, celebrate Take Your Dog To Work Day® and have a great benefits package. Although it is not a prerequisite to working with us, most of our employees are pet/aquarium owners. We love what we do!


How to Set Up an Aquarium Chiller

$
0
0


Aquarium chillers are devices that reduce the temperature of the water in a fish tank. At first glance, an aquarium chiller may appear to be an odd accessory for a tropical aquarium. They are, after all, filled with tropical animals that are accustomed to tropical temperatures.

While tropical fish need warm water, real problems can arise if the water gets too hot or fluctuates too much. As the temperature rises the oxygen level drops, making it more difficult for fish to breathe. Higher temperatures also lead to increased problems with nuisance algae and parasites. Most importantly, tropical fish like stability. High temperature fluctuations often lead to unhealthy fish.

This is especially true for a saltwater aquarium.

Day to day temperatures in the ocean are very stable. However, achieving stable temperatures in a reef aquarium can be very difficult. All of the equipment used to maintain a reef tank, like high intensity lighting and powerful pumps, put a lot of heat into the water. This can make the tank heat up rapidly. During the summer, the heat can become lethal. While fans may help some, many aquariums need a chiller to keep temperatures safe and steady.


BUY THE RIGHT CHILLER

Do not buy an underpowered chiller. Keep in mind that most aquarium chillers are rated for the volume of water they can cool, but do not take into account heat put into the aquarium by lights and pumps. So, if you have a 100 gallon aquarium, you will need a chiller rated for more than 100 gallons.

When picking a chiller, consider the long term costs. If you buy a chiller that is just powerful enough, you may save some money initially, but you will pay far more in the long run. A chiller should not run more than 15-20 minutes each hour. However, an underpowered chiller will run a lot. This will shorten the life of the chiller and raise your electricity bill considerably. You can get an estimate of your electricity usage using our free Aquarium Electrical Cost Analysis Calculator.


PLACE THE CHILLER

Most chillers are not works of modern art. But, hiding the chiller in an enclosed area like the aquarium stand isn’t wise unless the stand is well ventilated. As the chiller draws heat out of the aquarium, it needs to expel that heat into the environment. If the chiller is not well-ventilated, heat will build up. This will cause the chiller to work less efficiently.

Some aquarists place the chiller in a separate room (or the garage). This takes extra work, but can hide an unsightly chiller. When I installed my chiller next to the stand, I put an end table over the chiller and disguised it with a thin tablecloth. This kept the chiller well-ventilated and my wife happy.

You also want to consider the amount of power the chiller uses. Chillers pull a lot of electricity, so you probably don’t want your chiller plugged into a multi-plug adapter. You also need to be careful, because if your chiller, combined with your other equipment, is drawing more power than the circuit is built for, the circuit might trip causing power to be lost. This can be dangerous if it happens while you are away.


INSTALL THE CHILLER

There are two basic types of chillers: drop-in chillers and in-line chillers. A drop-in chiller has a heat exchange coil that is placed in the sump. This is pretty straightforward, so we will focus our attention on installing an inline chiller.

Inline chillers must have water pushed through them. Before installing your chiller, you need to determine the appropriate flow rate, which should be listed in the manual. If the water is moving too fast or too slow, the chiller will not work properly.

Nano-Tank Chillers

You will (probably) need:
Most nano-tanks have a dedicated reservoir in the back of the tank that houses all of the filtration. The best way to install a chiller is to insert a feed pump into the reservoir (or the main tank if there is no other option). A Maxi-Jet pump will usually fit in the space allotted. Attach the U-tube with hose clamp to the pump and drop it into the reservoir. Then, run tubing from the feed pump to the inlet of the chiller. JBJ makes a nano chiller installation kit that includes many of the parts you will need. Next, run tubing from the outlet of the chiller back to the tank. Attach the tubing to the S-tube which will hang on the back of the tank.

Double check to make sure everything is snug and that you have created drip loops, and fire the pump up. Then, jump ahead in the article to "Temperature Controllers."


Chillers for Larger Systems

You will (probably) need:
For this installation guide, we will assume that your chiller is next to the stand, and that you have a sump. You have two main options for feeding the chiller. If the flow rate on your return pump matches what the chiller needs, you may want to plumb the chiller into the return line. This means that the return pump sitting in your sump will deliver water to your chiller, and then directly from the chiller back into the aquarium.

Your other option is to have a dedicated feed pump sitting in the sump. Some aquarists prefer this setup. There are a few advantages to this. Water from the sump is not slowed down going through the chiller, affecting tank circulation. Nor will water sit in the chiller whenever the return pump is turned off. Standing water can easily freeze inside a chiller, which can cause significant damage. The downside is that you will need an additional pump.

Installing a chiller on a larger aquarium is not much different than the nano-chiller installation above. If you are using the return pump, insert the chiller inline between the pump and the return nozzle. If you are using a feed pump, send tubing to the inlet of the chiller and then from the outlet back to the sump.


TEMPERATURE CONTROLLER

The temperature controller measures the temperature of the water to determine when the chiller should run. Many chillers have internal controllers. But, you can also purchase an external temperature controller or use an aquarium controller like the Reefkeeper or Apex.

The best temperature controllers are dual stage. This means that they can control two devices at once: the chiller and the heater. The last thing you want to do is have your chiller and heater running at the same time.

Set the temperature controller to turn the chiller on when the tank reaches a target temperature, say 80°. Many controllers then allow you to set a temperature to turn the chiller off at. Set this a few tenths of a degree below the temperature the chiller kicked in at, say 79.5°. This way, the chiller will not constantly turn on and off. Set your heater to come on at a lower temperature, say 79°. This way, your heater and chiller will not be in competition, and your aquarium will not fluctuate more than 1°.

There you have it! You now have a functioning chiller that is keeping your fish safe and happy.

Now, don’t forget periodic maintenance. Check the chiller fan and housing often for dust buildup to keep the air flowing. A chiller choked by dust will run inefficiently and may break down. Occasionally, remove the chiller from the system and run a vinegar/water solution through the chiller to remove any calcium buildup. A bucket, pump, and some tubing work great for this task.

If you have any questions about choosing or installing a chiller, we would be happy to assist you.

See how an aquarium chiller works in this diagram

A new AquaMaxx HOB Skimmer with EXTRA OOMPH!

$
0
0
For hobbyists that have been searching for a great hang-on skimmer, here is one that you should take a close look at.


Following the proven and incredibly popular AquaMaxx HOB-1 skimmer, the HOB-XC shares many of the great design features while being a little larger to make it more effective for bigger aquariums. While the HOB-1 is rated for aquariums up to 75 gallons, the HOB-XC can handle aquariums up to 90 gallons.


The AquaMaxx HOB-XC utilizes a high-quality Italian-made Cobalt Aquatics pump that is specifically designed for protein skimmer applications. As the pump is the heart of a protein skimmer, having a great pump is definitely something to look for.


AquaMaxx goes the extra step of fabricating a custom needlewheel impeller to maximize the performance of the pump and minimize the size of the air bubbles for improved performance. For skimmer performance, having many smaller air bubbles is better than fewer larger air bubbles as the smaller air bubbles will have much more surface area to attract proteins.


The finely-chopped air bubbles are then sent to the skimmer reaction chamber though a bubble diffuser plate that minimizes turbulence and allows for a smoother transition to the collection cup.


One convenient feature that the HOB-XC has is the designated heater column. The extra chamber between the reaction chamber and the water return chamber allows you to install a heater up to 250W. Having a clunky heater in the aquarium is often quite an eye sore; this convenient feature allows you to hide the heater inside the skimmer and out of sight. The heater column also helps to reduce micro-bubbles.


The HOB-XC also features an air silencer to reduce noise and a convenient collection cup drain to allow you to drain the skimmate into a separate container.


The sleek back body gives the skimmer a nice modern look that is easy to blend in to your aquarium. The clear side panels allow you to easily view inside the skimmer.


With all the right features, great build quality and a high-performance/dependable Italian-made pump, the new AquaMaxx HOB-XC should be an awesome skimmer for anyone looking for a great hang-on-back skimmer for their 50-90 gallon aquariums.

my girlfriend's favorite coral... the Jack-O-Lantern Leptastrea.

11 Inspirational Innovative Marine Nuvo Aquariums

$
0
0
All-in-one tanks have become massively popular in the reefing side of the aquarium hobby thanks to their compact footprint, built-in filtration capabilities and the growing number of options that have hit the market in recent years.

Southern California-based aquarium manufacturer Innovative Marine has been leading the charge, unleashing an amazing 11 AIO-style tanks in a variety of shapes and sizes.

With such an impressive arsenal of aquariums available, with tanks ranging from 4 to 120 gallons, there is likely an Innovative Marine aquarium available to fit every would-be reefer’s budget.

I spoke to some of the friendly folks at Nano-Reef and Reef Central and was able to round-up one inspirational example of each of Innovative Marine’s 11 Nuvo Aquariums. So, without further ado, here is my list of inspirational aquascapes, listed from smallest to largest.

via SgtBhaji
Innovative Marine 4 Gallon Pico Aquarium
Although this is the smallest of all the Innovative Marine aquariums, the aquascape makes it seem like there's a lot of room in the tank for corals. The clamp-on Innovative Marine Skkye Light gives that extra color aesthetic to the corals and looks very sleek on top of this 4 gallon masterpiece. I also love seeing MaxiMinis inside nano tanks and the multi-colored ricordea rock is going to look great as it grows out.


via iDerek
Innovative Marine 8 Gallon Nano Aquarium
The aerial view of this tank is stunning! The LPS and soft coral combinations look vibrant and colorful from the top. The colony sizes and placement makes this tank look like it has a lot more corals than it actually has, something most reef hobbyists strive for. The use of chaeto algae in the bottom left corner is a great alternative to a refugium and it gives the aquarium that much more color. Again we see the Innovative Marine Skkye LED Light fixture growing very healthy looking corals.


via Nepenthe
Innovative Marine 16 Gallon Nuvo Aquarium
The lighting for this tank is what first caught my attention. This is a 24" long aquarium which minimizes your lighting options. The use of dual Innovative Marine Skkye LED on each end with a Kessil A150W in the middle gives the tank the capabilities to grow almost any coral in the right spot. The EcoTech Marine VorTech MP10 powerhead is giving the duncans and euphyllia corals that amazing flow you see in the image. This tank is not only packed with corals but the equipment attached is why I chose this as my favorite 16 gallon.


via Polarcollision
Innovative Marine 24 Gallon Nuvo Aquarium
The color popping out of this tank is the reason why I chose this aquarium to represent Innovative Marine's 24 gallon model. The use of dual Aqua Illumination Hydra LED fixtures gives the long 36" tank the capability to place coral virtually anywhere in the tank with no dark spots. This is a great example of a colorful mixed reef aquarium.


via Islandoftiki
Innovative Marine 30 Gallon Micro Nuvo Aquarium
This 30 gallon aquarium has it all: a Maxspect Nano Razor R420R LED fixture, a CAD Lights Nano Pipeless Protein Skimmer and an EcoTech Marine VorTech MP10 powerhead. Each one of these products are among the best available on the market today. The proof is in the healthiness and growth of all the corals, especially my favorite, a mature monti cap that is growing every which way!


via Bobyboy
Innovative Marine 30 Gallon NUVO Fusion 30L Aquarium
I love this tank! The new 30 gallon long is just like the popular 24 gallon, but with even more room for filtration and corals. The use of the EcoTech Marine VorTech MP10, Maxspect Razor R420R 160W LED Fixture and the Innovative Marine Midsize Protein Skimmer and MiniMax Reactor. The aquascape leaves plenty of room for coral on the rock and sandbed.


via BusterDB
Innovative Marine 38 Gallon Mini Nuvo Aquarium
The Tonga branch aquascape gives this aquarium an amazing look. The heree dual EcoTech Marine VorTech MP10's and Innovative Marine Spin Stream Return Nozzles deliver incredible randomized flow throughout the entire tank. The EcoTech Marine Radion Pro enables this tank to have a mixed reef with a great variety of SPS up top and LPS down below.


via muttley101
Innovative Marine 40 Gallon Nuvo Fusion 40 Aquarium
The Fusion 40 is one of Innovative Marine's newest additions to its aquarium quiver and truly one-of-a-kind. With its 24" length and 20" width, it has a great cube-shape with very clean-looking corners. The bare bottom look is a gaining popularity and looks great with this tank and aquascape. The aquarium is equipped with dual EcoTech Marine VorTech MP10's for flow, plus an Innovative Marine Midsize Media Reactor and AquaMaxx HOB-1 Protein Skimmer for to improve water quality.


via BlakeFoster
Innovative Marine 60 Gallon SR-60 Nuvo Aquarium
The SR-60 is the smallest aquarium in the SR (shallow reef) Series from Innovative Marine. The amazing variety and size of the coral colonies combine to create a stunning aquascape. The equipment the owner selected is clearly doing its job because the tank is very clean and all the livestock appears healthy and colorful. You'll notice dual EcoTech Marine VorTech MP10 pumps for flow; a CAD Lights Pipeless Protein Skimmer and Innovative Marine's own MiniMax Media Reactor help to keep the water clean.


via gahumphrey
The rubble pile look of this aquascape is something you see a lot while diving in real ocean reefs. I think this aquarium has a great aesthetic feel to it and leaves plenty of room to play with. I love the gradual slope and peaks of the rock work. The bright LEDs you see are dual Aqua Illumination Vegas; an AquaC Remora Pro-S Protein Skimmer hangs on the back of the tank to pull out organics. The music lyrics and guitar artwork on the wall behind the tank definitely add to the tank's personality.

via Eastamherstbias
Last but certainly not least is the largest in the Innovative Marine aquarium family, the 120 gallon shallow reef. The triple EcoTech Marine Radion LED Light Fixtures are super stylish and capable of growing any kind of coral in any part of the tank. The many trenches and shelves in this aquascape make it perfect for both the aquarium keeper and the fish inside the tank. Even though this SR-120 isn't maxed out with corals, the massive colonies that are present give the tank all the aesthetics it needs.

Product Review: Innovative Marine Ghost Protein Skimmer (FullSize), Part 3

$
0
0
Welcome to Part 3 of my Ghost Skimmer review. Miss the first two installments? Check out Part 1 and Part 2!

I have been testing this skimmer for about a month now and I have a pretty good understanding of how everything works so let's get to it!

I tested the skimmer in a 10 gallon tank for a few weeks which you can see in Part 2. I moved the skimmer over to a 5 gallon bucket so I could raise the water levels. I continued to pour skimmate from my display tank into the bucket so I'd have something to skim out which proved to be a pretty good controlled testing environment.
Water level raised to the highest point using the black tubing corner as a marker.
The skimmer still worked well for a wet skim, but the cup would need to be raised
otherwise it would fill up too quickly.
We all have to understand that this skimmer is designed specifically for the Innovative Marine Fusion aquariums. Some adjustments can be made to use it on the Innovative Marine NUVO tanks and even other aquariums. In order to use this skimmer in a NUVO aquarium, you will need to raise the skimmer with a magnet cleaning mount such as a Mag-Float or build some sort of platform stand. You can see the example shown by the manufacturer on the Innovative Marine Facebook Page.


Top down view of the skimmate I've collected.
I have tested this skimmer at various water heights starting from 6 to 12 inches since typical in-sump skimmers have a water depth requirement of 6-10 inches. Unfortunately, this skimmer does not work with a lower water level. In my tests, the Fullsize Ghost Skimmer will need at least 11.50 inches for optimal performance. I raised the water to 12.25 inches and it still skimmed like a champ, but you'll need to raise the cup unless you want a wet skim.  Innovative Marine has provided a useful water line diagram that you can see here.

Innovative Marine's optimal water level is about 11.42 inches to be exact according to
their diagram, but this is the water level that I preferred to get a good skim with the cup pushed all the way down.

The skimmer adapts pretty well to slowly decreasing water levels as what you would get from everyday evaporation. I let the water level drop a 1/4 to 1/2 an inch and it still produced good skimmate. The skimmer itself is very easy to adjust as all you have to do is raise the cup for a drier skim or lower for a more wet skim. The DeskTop and MidSize Ghost Skimmers come with an adjustable air valve and I kind of wanted to see this on the FullSize version as well. The capability of controlling the air intake can sometimes be useful when treating with medication or even a red slime remover to prevent the skimmer cup from overflowing too quickly. At least it will be easy to add one with some tubing and a valve, if necessary.

This is how far the skimmer cup sits in the body of the skimmer. The very bottom of the skimmer cup (when the cup is pushed all the way down) is the optimal water level according to Innovative Marine, but I prefer it a little higher as shown in the picture above.

My final thoughts: I think one of the biggest advantages for this skimmer is the simplistic design which makes cleaning and maintenance easy to do which we often overlook. Let's face it, if it's not easy, then we're probably not going to take it apart to clean. Most other skimmers have multiple screws and components just to get access to the pump, but this Ghost skimmer only has the bubble plate holding the pump, and you don't have to twist or unscrew the skimmer cup, just lift to empty!

They even included a convenient drain fitting which has two purposes.  You can use it to dump the skimmate into an external container or allowing water to pour back to the aquarium should the skimmer cup overflow. The drain fitting is even ergonomically placed higher in the cup allowing it to maximize the amount of skimmate that can be collected before needing to empty it.

The Ghost skimmer performed well by pulling out all the stinky skimmate that I poured in from my display tank. I was hoping the pump would quiet down over the next couple weeks which it never did, but it could just be the metal impeller shaft from my pre-production model. The higher water level requirement is another bummer for sumps with a set baffle height, but then again it is understandable as this skimmer is designed for the Innovative Marine Fusion aquariums. An included magnet would have been a nice touch for non-Fusion tanks, but it would have increased the cost of the skimmer.

Overall, it was a good performing skimmer as you see from the skimmate collected in these photos, and I thoroughly enjoyed testing it. I hope you all learned something from my 3-part review. Come back soon for more exciting reviews at our Marine Depot's Blog!

The cup sits approximately 3.25 inches into the body. I typically skim a little more wet than most hobbyists so I prefer submerging the skimmer a little deeper than the recommended 11.42 inches water depth.

4 Signs It's Time to Get a Calcium Reactor

$
0
0

When I first got into reef keeping, the hobby appeared extremely daunting.

I felt I needed to be an engineer, biologist, chemist and several other "ists" all rolled into one in order to be successful.

There is so much information, so many "must-have" gadgets and so many chemicals that must be monitored and dosed it made my head swim.

One thing made clear to me from the start—something experienced reefers and shop owners I spoke to unanimously agreed upon—was the importance of maintaining proper calcium and alkalinity levels inside your reef aquarium.

ESV B-Ionic 2-Part Calcium Buffer

With my first couple of reef tanks, I used two-part solutions (specifically E.S.V. B-Ionic or Two Little Fishies C-Balance) to help me maintain calcium and alkalinity. As my coral collection and knowledge of the hobby grew, so did the size of my aquariums. Manually dosing my tank soon became an everyday thing. I knew there must be a better way!

After doing some research and speaking with other hobbyists, I decided it was time to try a calcium reactor. To this day, I still regard adding a calcium reactor to my reef aquarium as one of the best investments I've ever made in this hobby. It simplified my daily tank maintenance and helped automate my system to a certain extent.

Your reef aquarium may now be at a stage in its development where a calcium reactor would be enormously beneficial, making upkeep easier and corals flourish. But how do you know for sure when it's time to get a calcium reactor?

You're in luck, fellow aquarium lover. I've put together a list of the Top 4 signs you should be on the lookout for to let you know it's time for a calcium reactor.


AquaMaxx Star S-1 Calcium Reactor Package 2

SIGN #1

When the amount you spend on two-part supplements is higher than your electric bill, it might be time to get a calcium reactor.

I'm exaggerating to make a point, but if you're adding gallons of two-part to your reef tank to maintain calcium and alkalinity levels each month, my example may no longer seem off base once you start doing the math.

If you have a small tank, like a nano reef, you may never find yourself in this position: a couple of bottles of two-part and a disciplined maintenance routine and you'll be straight for months. For larger reef aquariums, you may end up dumping quite a bit of two-part solution into your tank. As days, weeks, months and years pass, the time and cost of dosing can really add up!

While the initial monetary investment in a calcium reactor is pretty hefty (as far as aquarium equipment goes), the long-term costs are minimal comparatively speaking. Sign into your Marine Depot account to check how much you're spending annually on two-part supplements to determine if a calcium reactor may make more fiscal sense.


Reef Tank Parameters Chart

SIGN #2

When you find that your tank is so demanding you actually forget to dose any one of the many additives you are using, it's probably a good time to start shopping for a calcium reactor.

Back in my two-part dosing days, I would occasionally forget to add vital chemicals to my tank due to work or play. This is a serious no-no! As we all know, keeping water parameters stable is extremely important to the health and vitality of reef tanks. Corals can show signs of improper care rather quickly; neglecting your dosing regimen for even a few days may cause issues.

Once you've dialed in the settings of a calcium reactor, there is very little left to do. A quick check each day to ensure the CO2 bubbles are bubbling properly and that effluent water is dripping at the appropriate rate is about all you'll need to remember.


SIGN #3

If your water parameters are constantly fluctuating, I would suggest looking into a calcium a reactor.

I mentioned it earlier, but it bears repeating: stability is one of the major keys to having a healthy tank. Sure, dosing two-part solutions and kalkwasser are effective ways to maintain calcium levels. But they can also cause levels to rise quickly (when first dosed) and drop gradually over the next 24 hours while consumed by the livestock in your tank. The cycle continues each time you dose: levels quickly rise and then fall.

A calcium reactor provides a steady supply of calcium and other elements into your water to provide a more stable, ocean-like environment... which is really what we're all striving for anyway.


Innovative Marine SR-120 Shallow Reef Aquarium

SIGN #4

If your corals are beginning to outgrow your aquarium and you're considering moving to a bigger tank, that's an ideal time to work a calcium reactor into your new & improved reef aquarium system.

There's no reason you can't set up and run a calcium reactor from the start of a new tank. As the calcium demands of your new tank increase from new coral frags and colonies, you can adjust the settings of your calcium reactor and dial them in to match the increased uptake by your livestock.


Korallin Calcium Reactor 1502 Package 2

CONCLUSION

Once you've got your calcium reactor settings dialed in, there really isn't an easier, more stable way to maintain calcium and alkalinity in your reef tank.

Like a lot of equipment in this hobby, calcium reactors may initially appear to be too complicated to set up for the average reefer, but this simply is not the case.

With a little time and patience (and help from your friends at MD), you can get a calcium reactor up and running in no time! I explained how to set up a calcium reactor in one of my earlier articles if you're curious about next steps.

If you think it may be time to upgrade to a calcium reactor, contact us today and we'll help you select the right equipment for your specific tank. We'd love to hear from you!
Viewing all 374 articles
Browse latest View live