Quantcast
Channel: Marine Depot Blog
Viewing all 374 articles
Browse latest View live

How Dirty are your Socks?

$
0
0
Personally, I'm a fan of Bliss Softening Socks... but we're going to talk about filter socks in this article. :)
Many sump designs incorporate a sock for filtration while others use filter pads, floss and sometimes a media basket stacked with carbon and Purigen.
Filter socks vary in size, material and filtration capabilities. The standard sizes available are 4 and 7 inch diameters.
The length of the socks varies by manufacturer. I generally prefer the longest sock to fit my 17 inch tall sump. A bigger sock can hold more detritus and filters your system longer than shorter socks. This is great for when I am traveling but also when I am lazy. I typically go 3-4 days before a short sock needs to be changed, and about a week before the longer one is clogged up.

Socks are made in felt material and mesh. The felt comes in 100 or 200 microns. Micron is short for micrometre which is one-millionth of a meter (I just Googled that). ;) Basically the smaller the micron rating of a filter sock, the more crap it will filter from your tank. So by that measurement, a 300 micron sock (usually the mesh kind) won't catch much except boulders. A 100 micron filter sock catches much more detritus and particles and will need to be changed faster than a 200.

And, as you probably guessed, the second kind of material available for socks is nylon mesh. I prefer to use the nylon mesh to catch flatworms that I siphon out in case of a population explosion. Been there, done that.
Another variety of filter sock available is the drawstring kind. They come in both felt and mesh material and are ideal for sumps which do not have a filter sock holder or for those that would not fit the standard sizes available.

How Dirty are your Socks?
Each tank is different and what your filter sock pulls out might surprise you. I've seen amphipods, asternia starfish, bits of algae and baby limpets by the dozen. Some aquarists have found a fish or two that took the trip down the overflow into the sock. Cleaning the socks is easy and it is best to have more than one sock around so that you can alternate without shutting down your filtration for lengthy time periods.
Some hobbyists prefer to turn the sock inside out, rinse very well (beat the sock against the side of the sink I say) and throw it back in. This preserves the biological filtration capacity, however, this should not be a concern in established aquarium. Hydrogen Peroxide is also used as an oxidizer of organic matter and to clean the sock. I found that it turned the sock yellow.
If you intend to throw the sock in your washing machine, run it without soap on just the rinse cycle and pray that your significant other is okay with it.
The method I use is bleach. My intent is not to bleach the sock to a pure white (and that never happens) but to most effectively get it clean of organics. I start with a dirty sock or two. I rotate between 3 socks that are 200 microns each.


I fill a small bucket with hot water and pour in a generous amount of bleach and let it soak for a minimum of 3 hours or overnight. Then I rinse the sock very well, inside out, repeatedly till all the grit is released. After that I soak the sock again for 24 hours with water and Seachem Prime.
Prime is a liquid that converts ammonia to a non toxic form and also removes chlorine that would be in the tap water I use to clean the sock. I rinse again and let it dry but, at this point, it is ready to be used again without it being dry. Any ammonia that could remain is food for the macros in my refugium and for my clams in the display. The bio-filter is more than adequate to deal with my method in case of a misstep.
Dirty socks are an important indicator of the filtration in your tank. Detritus that is suspended and sucked into the overflow to the sump is visible in the filter sock. If your socks are too clean and don't need changing too often, hopefully that is because you are running an ultra-low nutrient system by choice, and not because the crap is staying in your display.

The real deal about eels: feeding, care and compatibility

$
0
0

Serpents of the deep.

Aggressive carnivores that swim with an eerie snake-like motion and sit with jaws agape displaying gnarly rows of teeth that are ready to latch onto any unsuspecting prey that may swim by and entice this animal’s extremely well-developed sense of smell.

Eels are among the most fascinating marine animals for many of the reasons mentioned above. However, not all saltwater eels are suitable for home aquariums and the ones that are require specialized care.


In this article, we are going to explain how to care for eels suited for life in a marine reef aquarium as well as address some of the common myths that surround this particular family of aquarium pets.

For marine aquariums, two families of eels are represented in the hobby and regularly available for purchase. The largest is the Muraenidae family, or “Moray Eels,” which include pretty much all of the eels we have come to know: Snowflake, Green Moray and even Ribbon Eels all come from this family.

The second is very specific: “Garden Eels” come from the family Congridae and are even more demanding when kept in aquariums than their larger, more aggressive cousins. I personally have only seen two species of Garden Eels available for sale, the Spotted Garden Eel (Heteroconger hassi) and the Splendid Garden Eel (Gorgasia preclara).

Adult Snowflake Eel at Age of Aquariums in Long Beach, CA.

Moray Eels – Family Muraenidae

The biggest misconception with Moray Eels is that they are all extremely aggressive and will completely clean out your aquarium of other inhabitants as well as pose a risk to your fingers during feeding time.

While this is true for many of the Moray Eel species, there are a few exceptions. These “reef safe” eels primarily prey on crustaceans and have rounded, molar-like teeth that help when feeding upon hard-shelled crustaceans. You have much less risk of a serious injury if bitten and they tend to leave other fish, corals and invertebrates alone when kept fed and healthy.

Snowflake, Zebra and Chain Moray Eels are among the “pebble-toothed eels” and make for great aquarium inhabitants. The second group of Moray Eels commonly found in our hobby is “fang-toothed eels” which have precisely that: numerous sharp teeth designed to shred and tear prey apart. This group includes many of the more fascinating eel species, but they are also difficult to keep in most home aquariums.

I say this for a few reasons. First, they pose a risk to your health. If bitten by a fang-toothed eel, it is nearly impossible to remove the animal without harming and/or killing it. Even after death, their specialized jaws will stay latched on and must be manually pried off. Second, they grow quite large. They may become more aggressive or even die if they are not provided the proper living conditions for a large animal. Lastly, they will make quick work of any other fish in your aquarium and must therefore be kept in a species-only tank. That’s why, in my opinion, we should leave these animals in the sea or the capable hands of dedicated, expert aquarists willing to provide the type of environment these eels need to thrive in captive care.

Dragon Eels, Green Moray, Yellow-Head Moray, Jeweled Moray, Tessalata and Golden Moray are all considered fang-toothed eels.
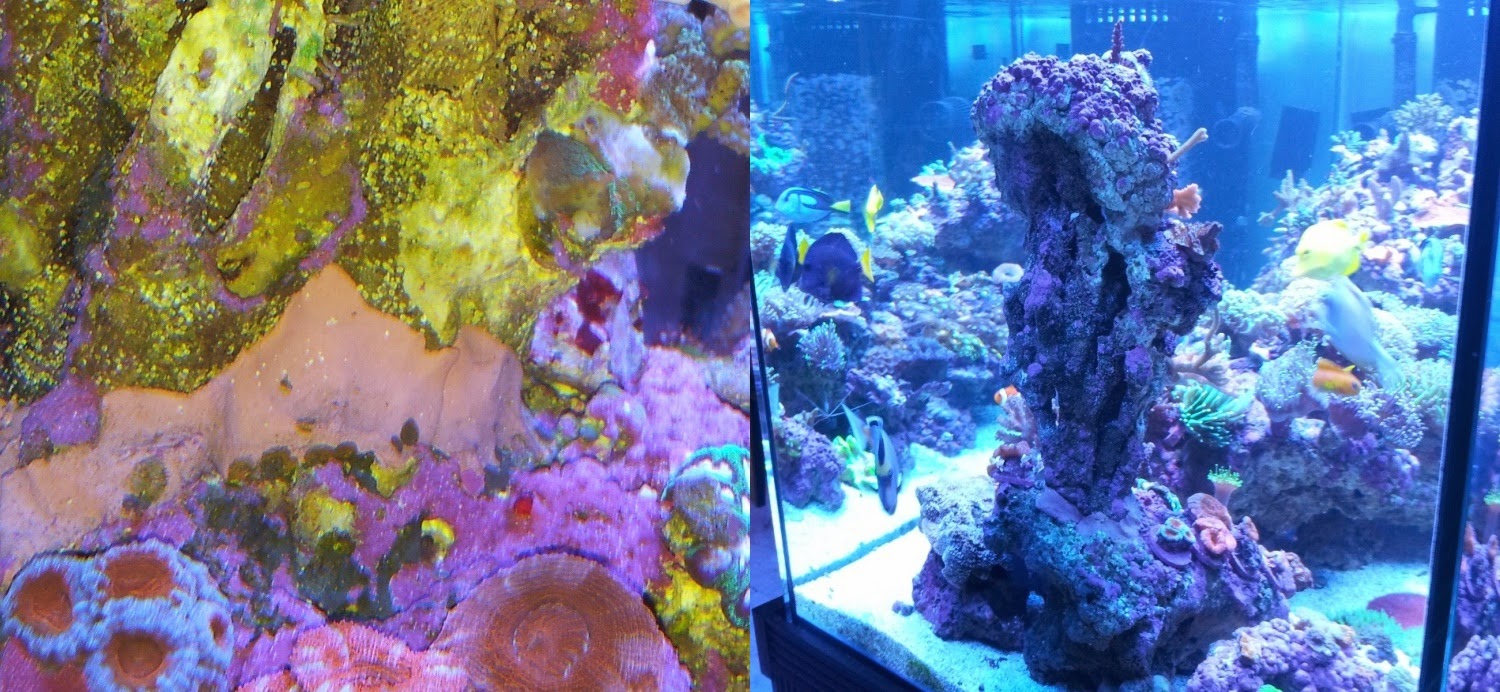
HABITAT
Eels are well-known escape artists. Many hobbyists have stories of eels flapping on the floor or getting caught in a small opening of their aquarium lid. If you’re going to keep a saltwater eel, be sure your aquarium is secure and that your lid fits tightly so the eel cannot escape.

Moray Eels can become quite large. The largest can grow to over 12 feet long!

Fortunately, pebble-toothed eels popular in our hobby do not grow that large, although many can grow to 30 inches or more. Be sure your aquarium is large enough to accommodate a full grown adult eel. Many sources claim 40 gallons is the minimum tank size suitable for these types of eels. I disagree: I recommend no smaller than 75 gallons to accommodate an adult eel. This gives you enough space to create a natural habitat for the eel plus provides a little breathing room for other tankmates.

An eel’s natural hangout is inside a hole or crevice with only its head visible, gently swaying with mouth agape. You must therefore create a habitat inside your aquarium to accommodate this natural, rhythmic behavior. Secure aquarium rock together using epoxy to build an aquascape that features large caves and/or crevices. You can also place 2 to 3 inch diameter PVC pipes under your sand to make it easier for your eel to burrow. This will allow your eel to find a safe burrow in turn making the animal comfortable and more likely to thrive in your aquarium.

Juvenile Snowflake Eel at Age of Aquariums in Long Beach, CA.

FEEDING
Eels are carnivores are should receive a varied diet of large meaty chunks of food. Juvenile eels have to be weaned off of live foods in order to accept dead or prepared foods. This will allow you to provide the varied diet eels need. Prepared diets are much more readily available and healthier compared to the same species of live feeder fish or shrimp, day in and day out.

It is best to use a feeding stick or tongs to keep your fingers far away from the mouth of the eel. They have poor eyesight and it is difficult for these animals to distinguish a finger from a shrimp. This is why you hear about people getting bit by eels in their aquarium—it’s simply a case of mistaken identity!

Start by feeding the eel with the live food it is used to, only attached to a feeding stick or tongs. This will get the eel used to eating from the tongs. Then slowly switch out the live food for prepared bits of meaty food.

Here is a list of foods that are excellent for eels. Don’t be afraid to visit the seafood counter in your local grocery store! You can store cut up bits of food in your freezer. Remember, variety is always best.
SPECIAL CARE
Eels do not have scales. They excrete thick mucus over the entire surface of their body for protection. While this is extremely effective against parasites and infection, it makes eels very sensitive to many aquarium medications. It is therefore best to avoid medications altogether with eels.

Although they are hardy aquarium animals, eels can fall victim to poor water quality. If you notice an infection on your eel, more often than not poor water quality is the culprit. A series of water changes and the use of chemical filter media to improve water quality can quickly reverse the effects of an infection.

Keeping more than one eel in an aquarium is possible, but there are some obstacles. You need to ensure your aquarium is large enough and contains multiple burrow locations. An adult eel will become territorial over its established burrow and surrounding area. It is wise to introduce multiple eels of the same size at the same time for best results. Consider your aquascape home sweet home for your eel. Adult eels can be clumsy and inadvertently rearrange rocks and corals. This isn’t much of a problem with smaller eels, but it is something to keep in mind if you are planning on adding one to a mixed reef aquarium.
Garden Eels at the Aquarium of the Pacific in Long Beach, CA.

Garden Eels – Family Congridae

Garden Eels are among the most peculiar aquarium animals because of their unique behavior. These gentle carnivores live in groups and dig burrows in soft sand beds with their tales. One burrow per eel is the norm. They rest in the burrow with half or more of their body exposed, swaying in the current like a blade of sea grass keeping a watchful eye out for both predators and prey.

They are cowardly creatures that retract into their burrow when anything comes too close—with the exception of zooplankton and fish eggs, its favorite food choices in nature. A Garden Eel spends its days waiting for the next colony of zooplankton to pass. In the evening, it completely retracts into its burrow to get some beauty rest.

With a maximum size of 12 to 16 inches, these eels are the perfect size for home aquariums. They prefer to be in groups so the general rule is three or more in any one aquarium.

HABITAT
Garden Eels require a deep sand bed that can accommodate its natural burrowing habits. Eight inches is generally considered the minimum based on most of the information available from experienced Garden Eel keepers. Use fine-grade sand for the majority of the sand bed. Top the fine sand bed off with a ½ inch or more of coarse sand or crushed coral in order to keep the fine sand from blowing around your tank.

For space, you will need to provide plenty of open sand bed for the eels to burrow. Since these eels prefer to be in groups, you should provide at least one square foot of sand bed per eel. This will make for a minimum tank size of about 40 gallons. While it is possible to keep them in smaller aquariums, the frequency of feedings and the large amount of food put into the tank can quickly turn this into an unsuccessful venture for nano hobbyists.

A gentle current along the sand bed is required in order to help deliver food to your colony of eels. Garden Eels never really leave the burrow except when in search of some new real estate or when quarreling with others over the local beauty queen. By waiting patiently on the sandy bottom, these eels will prey upon zooplankton and small organisms that float by in the current. If food is out of reach from the burrow, the eel will simply let the food pass by uneaten.

FEEDING
Once established into an aquarium, Garden Eels have been reported to accept a wide variety of prepared aquarium diets. Newly introduced or young Garden Eels will accept live brine shrimp and can easily be weaned off of this live diet by slowly mixing in prepared aquarium diets over time. 

Zooplankton, Oyster eggs, Fish eggs, Copepods, Mysis Shrimp and Cyclops are all perfectly suitable foods for Garden Eels. The trick here is delivering the food in adequate amounts without fouling up your water quality.

Since they are total scaredy cats, spot feeding is impossible. You must deliver the bits of food via a gentle current to allow the eels the opportunity to naturally pick out the food from the mild current around their burrow. This process needs to be repeated a few times a day in order for the eels to obtain enough food. This process will inadvertently lead to excessive waste in the aquarium. Plenty of mechanical filtration and a strict maintenance schedule are required in order to keep proper water quality and provide sufficient food.

SPECIAL CARE
Most of the particular needs of these animals revolve around its specialized housing and feeding habits already discussed.

In terms of being reef safe, Garden Eels will not harm coral or invertebrates, but keep in mind their required habitat varies dramatically from a typical reef tank full of live rock. The easiest approach would be to keep them in a species-specific aquarium. If you’ve got the money and space for a tank large enough to house both a deep sand bed and a rocky reef for your corals, that would be OK, too.

Since Garden Eels are a timid animal, they can fall victim to larger carnivorous fish fairly easily. Big aquarium fish like tangs and angelfish may startle and cause them to retract into their burrows. This makes it difficult for the eels to obtain enough food in an aquarium with larger, more aggressive fish. These larger fish would be best kept in another tank and only smaller, peaceful fish with your Garden Eels.

COMPATIBILITY
View a full-size Species Compatibility Chart on our website.
If you have questions or experience keeping eels in your saltwater aquarium, please share your thoughts in the comments below.

References:

A Beginner's Guide to Pico Reefs

$
0
0

While it's no secret that we all love our reef tanks, it's also no secret that a reef junkie is never satisfied. We're always looking for the next piece of equipment, the next challenge or another place in the house where we can stick a tank. It should come as no surprise then that we're seeing a rise in the popularity of diminutive pico reefs across the hobby.

If you've been thinking of setting up a pico, you're in the right place. We're going to talk about the choices at hand for equipment, stocking options and of course the different tanks that make great choices for a pico setup.

First, A Word of Caution


Pico tanks aren't for the faint of heart. As you likely know, the larger the volume of water in a reef environment, the more tolerant the system is of changes. With many successful pico aquariums falling in the 2 to 4 gallon range, it's obvious that an excess of water will never be something that you'll enjoy in this project.

While the startup cost for a pico tank can be lower than what you would spend on a nano or larger setup, that money savings is certainly not a rule. I have seen many pico tanks that total into the thousands of dollars because of lighting, custom overflow systems and chilling systems to combat the heat generated in such a small space.

All of that being said, look at a pico as a project that you do because you enjoy the challenge, not because you think it will be easier or might save you a few bucks.

Now Let's Talk Tanks


As a general rule, anything below five gallons falls into the range for a pico tank. You'll need to fulfill the same requirements with a pico tank that you do with one of any other size (with a couple of exceptions). That is to say that you'll want to make sure that you have lighting that is appropriate for your livestock, a significant amount of live rock and/or sand, and of course water circulation.

There are a lot of all-in-one systems that work great either by themselves, or as a starting point for further customization. Innovative Marine's 4-gallon Pico is one such option, providing you with lighting, filtration and even a media basket. The clean look of the all-in-ones is very popular in the pico hobby, and you'll often find this sort of design used and modified to great results. 
The three-gallon Picotobe from JBJ takes a slightly different approach, opting for a hang-on-back filer rather than an all-in-one system. The potential advantage here is that you can readily use a number of different hang-on-back filters if the included option no longer fits your needs. 
Of course you can always take the bare-tank approach and then choose your lighting and filtration options as a blank slate. The Mr. Aqua brand of tanks are a great option here not only because of their high quality construction, but also because of their unique shapes and overall beauty.

Lighting Your Way


One of my personal favorite parts of pico tanks is the wide variety of lighting options that you have. While there are dedicated lights (such as the Skkye series from Innovative Marine) you're certainly not limited to only a single system. Many pico fans have had great success with small T5 fixtures, and PAR 38 bulbs are also very popular. Of course, if you're wanting the wow factor, it's incredibly hard to beat the A150 from Kessil
Whatever choice you make, you'll need to take into consideration the heat that the light will produce. Again, because of the small volume of water that we work with in pico systems, evaporation can become a major issue.


Staying Stable


As we talked about before, one of the biggest challenges of these tiny tanks is keeping the levels stable. Heating, cooling and salinity are going to require a fair amount of attention, and systems to automate these controls are likely going to become your best friend.

Auto top-off systems, such as the Tunze Nano Osmolator is a great option for keeping your water level where it needs to be. Tunze has done an awesome job of creating a tiny system that works really well with rimless tanks. 
There are great options for heaters in pico tanks, many of which can be hidden behind the wall in an all-in-one. The Cobalt Aquatics Neo-Therm is my personal favorite, but Hydor, Hagen and Eheim all have great options as well.
Unfortunately, the bigger problem than heating a pico is often keeping it cooled. Because of the close proximity of circulation pumps and the lack of size, pico tanks can tend to run somewhat warmer than we want them to. The IceProbe and MicroChiller systems, both from Coolworks, are great options for temperature regulation, and they're designed to work with smaller systems.

Of course the single largest investment (and likely the best one) you could make for your pico is a monitoring and controlling system. The ReefKeeper Lite system is my personal favorite for picos because of its ability to regulate temperature effectively without breaking the bank.

Stock Options


Now for the fun stuff! Pico tanks, because of their tiny size, aren't going to be the best option for most fish. You should always keep in mind that your ocellaris clown might be tiny today, but she's going to grow and need a few more gallons than a pico can provide. With that in mind, about the only fish that will be happy in a pico aquarium is something from the goby family.

As Metrokat pointed out in her recent blog post about fish choices for nano tanks, gobies are a perching and hopping fish. As such they don't require a lot of swimming room, but you'll definitely want to give them some live rock "perches" to make them happy.

Given that there are very limited options for fish in pico tanks, you'll find many of us pico enthusiasts opting toward coral-only setups. For my own system, a two-gallon all-in-one with PAR 38 lighting, I've found great success with waving hand corals, mushrooms and even a single-headed duncan coral. While it can be challenging to find areas of lower flow and appropriate lighting, many corals will thrive in pico systems, provided you pay careful attention to your parameters (especially salinity).

Wrapping Up


Whether you're just looking for a challenge, or maybe wanting a more interesting option for a frag and growout tank, pico reefs are a rewarding project that any reef junkie can appreciate. Like any reefing project, research and patience need to be your guides, but hopefully you now have a better understanding of where to start.

Coral Frenzy Reef Pellets: The ULTIMATE coral food now in pellet form

$
0
0
Coral Frenzy has been one of the most popular coral foods for some time now. It is a great alternative to live or frozen foods since it is easier to feed, is an excellent value and has a much longer shelf life.
Newly available from Coral Frenzy are Reef Pellets that are available in 0.5mm and 1mm sizes. These pellets are great for target feeding your LPS corals, zoas/palys, anemones and even your fish. The recipe consists of some excellent seafood ingredients including squid, herring, shrimp enriched with vitamins and fish oil to boost the nutritional value. 
Dendrophyllia ready to have a delicious meal
To feed, simply mix the food with some aquarium water then pour the food into an area of high water flow for broadcast feeding. You can also target feed with a feeding tool like the Kent Marine Nautilus or Julian Sprung’s Thing.

The larger pellets are great for anemones and larger-mouths LPS corals such as fungia, wellsophyllia, lobyphyllia and acanthophyllia corals. The smaller pellets are great for small-mouthed LPS corals such as echinophyllia, mycedium, acanthastrea and favia corals. The smaller pellets are also great for palythoas and zoanthids.
1mm pellets are great for large-mouthed LPS corals... such as this fungia
In the past, the focus of keeping corals healthy and growing has been on water quality and lighting. It is only in the past few years that we have begun to understand the importance of feeding.

More and more foods made specifically for corals have become available and Coral Frenzy has been at the forefront of this movement. With three different products now available—the original powder food, 1mm pellets and 0.5mm pellets—you can now ensure that all of your corals are well-fed and happy!

If you have been wanting your Bubble Gum Monster Chalice or your Rainbow Acan to grow faster and develop brighter colors, here is your new weapon!
Smaller 0.5mm pellets are great for corals like this chalice

Which Clean-up Crew Critters Should You Have in your Reef Tank?

$
0
0
Building a successful reef tank requires a lot of research and hard work. But, as we aquarium hobbyists know quite well, the journey is extraordinarily fulfilling.

However, it is important to know from the outset that the work is never done. Performing routine tank maintenance is crucial if you want your aquarium inhabitants to not only survive, but thrive. 

Even though you may have a small arsenal of aquarium maintenance tools and all the filtration equipment you could possibly fit in and around your system, there are still going to be areas inside your tank that you cannot reach or get clean enough.

Fortunately, there are a bunch of cool little critters you can employ to help keep your tank clean for you. These animals are most commonly referred to as the aquarium clean-up crew.

Clean-up crews commonly consist of snails, crabs, shrimp, urchins, sea stars, sea cucumbers, conches or pretty much any animal that will consume detritus and algae. For many hobbyists, clean-up crews are among the first animals added to a tank after it completes the aquarium nitrogen cycle.

The Aquarium Nitrogen Cycle
Some people think an aquarium clean-up crew’s job is solely to eat up algae. True, it’s one of their most advantageous traits, but it’s also far from all a CUC does for your tank.

Your aquarium clean-up crew works all day every day to keep your aquarium clean. Leftover food, for example, is a problem aquarium owners both fresh and saltwater face. Leaving uneaten food in your tank to rot and decay contaminates your water and throws off your parameters which can be dangerous to livestock. Most of the aforementioned animals will scarf up surplus food in your aquarium before it begins to deteriorate.

Detritus is non-living organic matter (like fish waste) that exists in every saltwater aquarium and is nearly impossible to remove without the assistance of clean-up crew workers. Sea cucumbers, shrimp and conches are a few well-known inverts that will consume detritus in a reef tank.

Your sand bed is a magnet to detritus build-up and can be difficult to keep clean. The good news is there are a variety of invertebrates like nassarius snails, sand sifting sea stars and tiger conches that will dig, crawl and slither about your substrate consuming detritus. They also stir up the sand bed helping to keep waste and debris suspended making it easier for your filtration system to remove.

Sand Sifting Starfish
Algae grows in just about every reef aquarium, often in unreachable areas between your tank walls and rockwork. There are a variety of cool tools to help remove it, although it’s tough to keep up even if you tidy your tank on a regular basis. Mixing saltwater and topping off your tank with reverse osmosis water will help, as well as keeping your aquarium water parameters stable and at ideal levels. Having an in-tank clean-up crew who continuously focuses on algae removal is another safeguard you can add to prevent algae from becoming a major nuisance. In my experience, crabs, snails, starfish, urchins and sea cucumbers are the most effective.

A question often posted to message boards and posed to our staff asks, “What are the best clean-up crew critters for a reef tank?” Different animals perform different duties and, while there is some overlap, our general answer is a combination of species works best to tackle some of the chores mentioned earlier in this article. A diverse clean-up crew will divide and conquer the gunk, funk and junk in your tank.

The following animals are the most popular clean-up crew critters you’ll find in a mixed reef tank:

Nassarius Snail

SNAILS

Snails are the most likely addition to an aquarium clean-up crew. Something many of us don’t discover until we’re in the hobby is that saltwater snails move much faster than one would imagine. Snails are natural scavengers that will eat algae and leftover food inside your aquarium. Snails also have the unique ability to clean algae off live corals without damaging them, arguably one of the best functions they can serve in a reef tank.

There are a variety of snails available in our industry, with each performing a different task within the circle of life inside your tank. Turbo Snails, Margarita Snails and Trochus Snails scavenge rock and glass for algae. Nassarius Snails eat detritus and leftover food yet spend most of their time buried in your sand bed. When food enters the water and they emerge to eat, they sift and oxygenate the sand bed which is actually quite beneficial.

Then you have the “do-alls” of the reef clean-up crew like Cerith Snails that eat algae, detritus, leftover food and fish waste.

Emerald Crab

CRABS

Another staple to aquarium clean-up crew are crabs. Crabs serve a vital purpose in the ocean’s food chain, although not everyone agrees they belong in a reef tank. Hermit crabs are the most common crab found in clean-up crews because they are affordable, entertaining and have an insatiable appetite for detritus, leftover food and even some types of algae.

Scarlet Hermit Crabs, also known as Red-Legged Hermits, are among the more peaceful species of hermit crabs. They are excellent scavengers and stay small so they can fit almost anywhere and are less of a threat to its tankmates. The Blue-Legged Hermit Crab is another popular reef safe hermit crab. They are productive cleaners but are known to be hostile.

Emerald Crabs are a great addition to any reef tank with bubble algae problems, although they mainly feed on leftover fish food and meaty foods. They have a bit of an attitude though and will prey upon small peaceful reef fish, so be careful when adding them to small tanks where the crab can easily catch fish.

Peppermint Shimp

SHRIMP

Shrimp are another sought-after addition to the clean-up crew. They are fun to watch and get into nooks and crevices to eat detritus and leftover food that other inverts can’t reach. Cleaner shrimp like the Skunk Cleaner can play an important role in your tank by cleaning parasites off fish and other living animals. Banded Coral Shrimp are another popular choice.

Aiptasia are a pest anemone prevalent in the saltwater aquarium hobby. They are regarded as a nuisance and often difficult to get rid of. Peppermint Shrimp are an inexpensive alternative to chemical solutions and will often consume these pesky glass anemones for you. In a well-fed aquarium, they may end up ignoring your Aiptasia and feeding upon leftover fish food instead, which is still helpful.

Asterina are small white starfish that reproduce quickly in saltwater aquariums. The handsome Harlequin Shrimp will eat any starfish it can in your tank, which can be super beneficial if you an abundance of Asterina stars.


CHOOSING YOUR CREW

Now that you know some of the primary clean-up crew critters, you may be wondering how many of each you need in your tank. You may read recommendations online which stipulate “one snail per gallon” or “one crab per four gallons,” although I find these rules too broad. To avoid overstocking your tank, I prefer a mix-and-match approach to address the specific biodiversity of your aquarium’s ecosystem.

For best results and to avoid overstocking, I suggest a conservative yet diverse base colony with a few of each of the key players and then growing your clean-up crew from there. If your tank develops an algae bloom, adding appropriate organisms to address the specific problem (as well as identifying the source) would be the way to go. If things get better in the coming weeks but you still see room for improvement, you might consider adding more of the same species or another animal known to feed upon whatever is ailing your tank.

Clean-up crew critters add a lot of life and movement to an aquarium. Watching crabs scurry about your aquascape and Nassarius Snails race each other up and down your aquarium walls brings a smile to any reefer’s face. Most clean-up crew members are easy to catch and remove. So, if the issue you were experiencing is no longer a problem, you can always round up the excess animals to place into another aquarium or share with one of your reefkeeping buds.

What animals do you have in your clean-up crew? Let us know in the comments below!

5 Creative Ways to Use LED Light Strips

$
0
0

LED aquarium lights have made a huge impact in our hobby because they save you money in a number of ways. Heat transfer into your aquarium, bulb costs and electricity consumption are considerably reduced or eliminated altogether when you make the switch to LED.

Another benefit of LED lights is they are extremely versatile and can be used a number of different ways in and around your aquarium.

We put together a list of our top 5 favorite ways to use LED strips that will save you money and make your tank look great.

I swapped out the T5 lights in a Coralife fixture with LED strips. Learn More

1. Retro-fit Your AIO Aquarium or Fluorescent Light Fixture

Compact fluorescent and T5 fluorescent lighting have been used to illuminate reef aquariums for years. The original Nano Cube, BioCube and Red Sea Max tanks were each outfitted with power compact or T5 fluorescent bulbs.

Many hobbyists still use fluorescent fixtures to light their tanks and with great success. With the introduction of LED light strips, we now have an easy and energy-efficient way to retro-fit our AIO aquariums and fluorescent light fixtures to achieve the optimal look and growth.

Retro-fitting an AIO aquarium or fluorescent light fixture can usually be accomplished with minimal effort. Most LED strips available for aquariums include mounting hardware, are moisture resistant and run on safe, low voltage DC electricity.

In most cases, you only need to take out a few screws to remove your existing fluorescent end-caps and electrical components. Sometimes you can even attach the LED strips directly to the existing reflectors without removing anything but the fluorescent bulbs. With the slim profile of LED strips, you can fit multiple LED strips to achieve ample output and spectrum for a light-demanding reef aquarium.

The Ecoxotic Panorama Pro 2.0 LED Module and Current USA TrueLumen Pro LED Striplight are two of the best options for this type of installation. Coupled with an affordable LED light controller, you can even accomplish dawn/dusk effects, dimming, timing and cool weather modes.


2. Light Your Refugium

LED light is available in a variety of colors, including full spectrum white, which is perfect for growing macro-algae in a refugium.

An LED strip with a tank mount option is ideal for this application. The AquaticLife Freshwater Expandable LED Fixture and the Current USA TrueLumen Pro Single Dimmable LED Striplight Kit are great, inexpensive options to light a refugium.

The amazingly organized aquarium stand of OnlyTono.
You can even use one of the PAR 38 bulbs and suspend an inexpensive dome reflector that is available at most hardware or home improvement stores.


You can replace supplemental VHO or T5 lights with energy-efficient LED light strips.

3. Supplement Your Lighting

If you already have a reef aquarium up and running and are using fluorescent bulbs for color supplementation, you can save money on your electric bill and bulb purchases by swapping out your fluorescent actinics for LED lights.

Ecoxotic Stunner and Panorama LED Light Strips are great for this application thanks to the wide variety of colors that allow you to create the perfect look for your reef.

A combination of T5 fluorescent and LED strips has been a popular topic for the future of LED lights. By using this combination you can accomplish the brilliant coloration and fluorescence found with T5 lights and get the stunning shimmer and money savings associated with LED light.

The LSM, with the addition of LEDs, allows your
Apex AquaController to create a realistic moon cycle simulation.

4. Try Lunar Lighting

Using LED lights for lunar light is not really a modern advancement in the hobby. LED moonlights have been available since I started in the hobby 10 years ago. LED moonlight options are plentiful and are easy to install on pretty much any aquarium.

Lunar lights allow you to view your aquarium during the evening and you're bound to observe some cool happenings that don't take place during daylight hours.

Advanced aquarists have reported that simulating the 29.53 day lunar cycle encourages spawning cycles for many tank inhabitants. Both Digital Aquatics and Neptune Systems offer moonlight options for their respective aquarium controllers that will allow you to accomplish this feat.

Dan from our team tests protein skimmers in his LED-illuminated sump area.

5. Light Your Stand or Accent Your Sump

The interior of most aquarium stands are cramped and poorly lit which can create some unnecessary stress while maintaining your tank. Adding a low voltage, slim LED light in your stand can make it much easier to work under your tank.

You'll find that dialing in your protein skimmer and media eactors, rescuing lost fish and general maintenance is much easier once you can see everything you're doing.

Do any of you fish heads and equipment gurus like to show off your awesome plumbing job that took way too much time and effort to accomplish?

LED accents are an excellent way to impress your reefkeeping buds and add some extra personality to your tank. The color-changing Ecoxotic RGB modules in particular are a very cool way to add some flare to your system.

Reef It Simple—Your First Reef Tank

$
0
0

Coming from a background in freshwater aquariums, I remember staring blankly at people when they would talk about saltwater reef systems. Salinity, alkalinity and phosphates, oh my! It seemed like the world of saltwater was prohibitively complex, so I put off building a reef system for years.

But there's really no reason to be intimidated by reef tanks. At their heart, they don't have to be any more complex than a standard freshwater setup. You just need water, filtration, light and livestock.

With that in mind, we'll be kicking off a small series that I like to call "Reef It Simple", focusing on how easy reef aquariums can be, while helping you to make informed decisions as you progress in the hobby.

For this first week, we're going to focus on aquarium chemistry. Before we get started, you should familiarize yourself with the ideal parameters for a reef tank. We'll talk more about how to keep your system inside of those parameters later in this blog post.

  • Specific Gravity: 1.023 - 1.025
  • Temperature: 72 - 78°F
  • pH: 8.1 - 8.4
  • Alkalinity: 8 - 12 dKH
  • Ammonia (NH3): None
  • Nitrite (NO2): None
  • Nitrate (NO3): < 1.0 ppm
  • Phosphate (PO4): < 0.2 ppm
  • Calcium: 400 - 500 ppm
  • Magnesium: 1350 - 1500 ppm
  • Iodine: 0.06- 0.10 ppm
  • Strontium: 8 - 14 ppm

Getting Wet


First thing's first, you're going to need some water. You could choose to buy pre-mixed saltwater from a local fish shop, but for anything larger than a pico tank this is going to get old and expensive very quickly.

The single best piece of advice that I can give any new hobbyist is to invest a little bit of money into an RO/DI system. RO stands for reverse osmosis and DI stands for deionization. Without getting overly technical, RO/DI water is tap water that has everything else taken out of it. Some systems will include a TDS meter for finding out the Total Disolved Solids that remain in water after it has been filtered, but you can also buy a standalone meter to measure this yourself.


It's often said that an RO/DI system is the most boring money that you will spend for your saltwater's setup. But that boredom will certainly save you loads of trouble in the future. Almost without fail, using tap water will end up leading to problems such as algae or even livestock death. While the addition of chlorine and other chemicals makes tap water safe for us to drink, it's not so hot for fish and coral.

Feeling Salty


There are seemingly endless arguments about which brand of salt is best for coral reef aquariums. What I can tell you, both from personal experience and from years of reading these opinions, is that every major brand of reef salt can produce great results.
It's worth noting that reef salt is slightly different from standard marine salt in that it contains major, minor and trace elements that corals need to thrive. Some hobbyists prefer to use standard salt mix and then dose the elements themselves, but we're focusing on simplicity. 


My personal favorite is Coral Pro Salt from Red Sea. But generally speaking what you're looking for in a reef salt is one that checks off a few boxes:
  • Expected parameters are listed on the package.
  • Does not require complex mixing procedures.
  • Harvested or created in a sustainable manner.
I have used a number of salts over the years, all with good degrees of success. But I've found that my corals are happiest and thrive better when I'm using Red Sea Coral Pro salt. Your experiences may (and likely will) vary.


Filtration Foundation


This is the area where saltwater and freshwater really differentiate themselves. Filtration in the freshwater environment relies largely on something like a hang-on-back, canister or sump filter. In the marine environment, almost all of the filtration happens in the cured rock and sand. We'll talk more about how the water moves around the tank in the weeks to come.

For a primer on filtration, make sure to read up on the nitrogen cycle. The Cliff's Notes version is this - waste from fish and food cause ammonia. That ammonia is toxic to fish and corals. You need an established colony of good bacteria to turn that ammonia into nitrates, which are less harmful to the livestock. These bacteria will establish themselves in the rock and sand that you use in your system.


In my setups, I have preferred to buy dry rock and then add an ammonia source in order to cycle the aquarium. I do this because it allows me to better control what gets into my system. However, if you want to have the chance at pleasant surprises (and don't necessarily mind the potentially unpleasant ones) you can opt to purchase a high-quality live rock. Cycling with dry rock is much, much slower but with either live or dry rock you can speed up the process by using a bacterial water treatment. In either case, having 1 to 2 pounds of live rock per gallon of tank volume should provide great filtration results.

In smaller tanks, it's common to use a hang-on-back filter to give you a contained area for chemical and mechanical filtration. In larger setups you will often see a sump (a smaller tank, with divided areas) used for added filtration. Generally speaking, if you're below 40 gallons, you shouldn't have to worry about using a protein skimmer. Your water changes will take care of that mechanical side of things. However, adding a skimmer can help to ensure better water quality regardless of tank size. As the weeks go on, we'll delve in deep with external filtration, but for now we're just focused on the chemistry inside of the tank.

The other important factor in your reef system is the sand bed. While there are arguments for days about bare bottom versus shallow versus deep sand beds, my personal experience has been that running one pound of sand per gallon of tank volume works very well. 

And Then...?


You have a tank, you have some saltwater, live rock and live sand...so now what? Assuming that your system is well-cycled (you remembered to buy a test kit, right?) it's time to cover the basics of tank maintenance in regard to chemistry.
Look back at that list of parameters at the beginning. If it seems overwhelming, take a deep breath and my assurance that it's not all that hard. Let's break them down:
  • Specific gravity: This is a measure of the amount of salt that's disolved in the water. You'll measure this via a refractometer or a hydrometer. Refractometers are more precise, but they're also more expensive.
  • Temperature: This is an easy one. Buy a really good heater and get a thermometer too.
  • pH: A little trickier. Mixed saltwater should remain fairly stable in this range. You will see differences under lights and in the day versus the night because of temperature differences. You can use additives to keep this where you want it, but most corals and fish are better at an imperfect but constant pH rather than with us chasing a perfect number.
  • Alkalinity: The more stable your pH, the more stable your alkalinity will be. For the most part, you won't see too much fluctuation here as long as your pH is stable. But if you go above or below the range, you can use additives to bring it back into line.
  • Ammonia, Nitrite, Nitrate: Here's the big one. If you have ammonia, fish and coral are not going to be happy. But once your aquarium's cycle is complete, you shouldn't have ammonia that is not broken down into nitrate. If you do have ammonia, you're either feeding too much or you have too many fish in your tank. You can use additives like Seahchem Prime to neutralize the ammonia, but only do so while finding out the source and correcting it. 
  • Calcium, Magnesium, Iodine, Strontium: These are all primarily related to corals, though some invertebrates and other livestock have elemental requirements too. Corals need certain levels of these elements in order to thrive. If you're using a reef salt mix, chances are that you're going to be fine. As you do weekly water changes, you'll also replace the elements that have been used. As you get more corals, you might find that the elements deplete too quickly. In that case you can dose the elements in combination or singularly as needed. 

"But that's still so much to know!"
You're right. It is a lot to know. But the beauty of a well-balanced (and lightly-stocked) reef system is that many of these factors will handle themselves quite well. Weekly 10 percent water changes will keep most of them in check. Making certain that you do water testing prior to a water change will help guide you as to whether you will need to do a larger change (normally to help control nitrates) or perhaps if you need to add elements back to the water (again, only common in more heavily-stocked coral aquariums).

Wrapping Up


The biggest thing to remember is this—nothing good ever comes fast in reef aquariums. Take your time, cycle your rock and sand very well and then be diligent with weekly water changes. The less time that you spend with your hands in the tank, the healthier and happier everything will be.

In the weeks to come we'll cover ways to make things even easier such as dosing pumps, auto-topoff systems and reef automation. But for now, take the plunge and start setting up your first reef. Just take your time, do your research and you'll be well rewarded by having a beautiful, healthy reef to enjoy for years to come.

Win a Two Little Fishies Phosban Reactor 150!

$
0
0

There are many ways you can add media to your aquarium. One of the best ways is by using a fluidized media reactor.

This week we are giving one lucky aquarium hobbyist the versatile Two Little Fishies Phosban Reactor 150 (a $34.99 value!), our top media reactor in 2011 and 2013!

If you want to lower phosphate and reduce nuisance algae in your aquarium, ENTER NOW

Registration ENDS at 11:59 PM PST on 4/7/14.

Details: Open to U.S. residents 18 years or older. Void where prohibited or restricted by law. Winner will be contacted via email.

Two Little Fishies AquaStik Epoxy Putty: Versatile and Easy To Use... Have you Tried It Yet?

$
0
0
Having been the hobby for some time, it’s remarkable how many different types of “glues” I have learned to use. I've tried cyano acrylate, silicone glue, plastic epoxy, PCV cement, acrylic adhesive and two-part epoxies.

Two Little Fishies AquaStik is a two-party epoxy and among the handy glues I've tested. It is great for attaching corals, attaching gorgonians and for gluing rock structures together or holding pieces in place.

Another particularly useful way to apply two-party epoxy that I've discovered is to mold it into barriers to prevent corals from growing into each other.

The Red Coralline-colored AquaStick epoxy putty from Two Litte Fishies.

The AquaStik comes packaged conveniently inside a tube. Just pop the cap off to pull the epoxy out. Cut off a portion and begin to kneed the two-part epoxy together thoroughly between your fingers (which should take about 30 seconds). The epoxy will heat up slightly and gradually harden.

You have about 5 minutes of working time, so take your time getting pieces exactly where you want them. It's important to note the epoxy is not sticky—it will not ‘glue’ pieces together. Instead, the epoxy is like a clay that hardens: try to work it into crevices so there is more the epoxy can hold on to.

Strips of epoxy helps this rapidly-growing Monti from growing over other corals.

To use as a barrier, simply roll the epoxy into a round strip. Press the epoxy down along the edges of the coral. The coral will grow on to the epoxy strip instead of further encrusting the live rock. You can then break the epoxy off and replace it with a new strip of epoxy to prevent further spreading. The broken off pieces can then be attached to plugs/discs to create new frags that you can grow out and trade.

The "sandwich" method works great to attach frags!

For mounting smaller frags, a popular method is the “sandwich” method.

Roll a small ball of epoxy then apply some coral glue (cyano acrylate) on the top and bottom of the epoxy. Place your “sandwich” on the bottom of the frag then attach the frag to your live rock.  The epoxy will mold to the shape of the live rock and the coral glue will help hold everything together.

Epoxy is particularly effective for attaching corals to contoured surfaces.

The AquaStik has held up the “Bonsai” column in my reef aquarium amazingly well. Previous efforts to support the column by strategically wedging pieces of rock together were futile. The structure is now rock-solid and the pink color of the epoxy helps it better blend into the rock work.

AquaStik Epoxy does a great job holding up my "bonsai" rock structure!

One small caveat is that using too much epoxy at one time does make your protein skimmer over foam for a few hours.

With its many uses, the AquaStik Epoxy is extremely handy and convenient. It is definitely a great glue to learn to use and have in your aquarium supplies cabinet!

5 ways to change your aquarium water like a pro

$
0
0

There are two schools of thought when it comes to aquarium maintenance: those who love it—and those who despise it.

Aquarists that love tank maintenance find the repetition relaxing and feel that being hands-on helps them stay in touch with their equipment and tank inhabitants.

Hobbyists that hate aquarium upkeep, like yours truly, dread the never-ending chores that are required to make a tank look its best.

I love designing, buying and building a new aquarium. Frankly, I love everything that comes prior to the whole maintenance side of keeping a tank. Sometimes I wish I could wave a magic wand over my aquarium and—abracadabra!—the water change and cleaning would be complete.

Until that day comes, I will continue doing what I have to in order to have an aquarium I am proud of.

If you are still performing manual water changes like I am, I'd like to share five tips I've learned over the years that should help makes things easier until you discover that elusive magic wand.

A Rubbermaid Brute trash container on a dolly with casters.

#1: Choose the right mixing container

If you have a pico tank or small nano aquarium, using a five gallon bucket to mix your saltwater may be more than adequate. You can purchase five gallon pails at your local hardware store and/or reuse empty salt mix buckets you get from aquarium supply stores like MD.

For larger aquariums, a Rubbermaid Brute Trash Can is probably the most popular mixing container used by hobbyists today. They are sold in 20 and 32 gallon capacities and are usually available at your local hardware store. Using a dolly with casters underneath will allow you to move the container across a room or down the hallway with ease. I use three of these containers: one for storing RO/DI water, one for mixing saltwater and one for the water I siphon out of the tank during a water change.

If you have a mammoth-sized aquarium and require even larger containers to store and mix your water, you've still got options. There are large polyethylene plastic tanks that meet FDA standards for potable (drinking) water you can order online or pickup locally at a farm supply store. They are sold in a variety of shapes and sizes so you should be able to find something that meets your needs if you're willing to shop around.

On top is an unused Hagen Quick Filter cartridge;
the bottom is after mixing two batches of salt in 5-gallon buckets.

#2: Mix your saltwater and keep it clear

Using a powerhead is one of the easiest and most economical ways to mix saltwater.

Just pour RO/DI filtered water into your mixing container, scoop in the appropriate amount of salt mix and drop in a powerhead (along with a heater to make the water an appropriate temperature for livestock).

You may notice residue begin to build up inside your salt mixing container after some time has passed. If this happens to you, or if your saltwater isn't mixing as clearly as it used to, I recommend using an Aqua Clear Powerhead with one of their Quick Filter Attachments. Since I started using this combination inside my mixing container, I rarely find it necessary to clean sludge off the side walls anymore.

The Aqueon Water Changer helps eliminate spills and transporting buckets of water.

#3: Drain your aquarium faster

A standard siphon is usually perfect for nano to mid-sized aquariums (75-100 gallons). They are also useful for sucking detritus out from in between rocks and crevices in larger tanks.

Of course, the flow rate from a standard siphon can be painfully slow, especially when you're performing a water change on a big aquarium. Fortunately, there are a few options that can help speed up the process of draining a large tank.

Using a larger siphon can make a dramatic difference. Siphoning water through 1” vinyl tubing rather than ½” tubing definitely helps speed things along. You can also place a powerhead inside your aquarium to push water out faster. Just attach one end of tubing to the pump outlet. Then put the pump in your tank with the other end of tubing inside your water change container and turn the pump on.

If you have a sump with enough water volume, you can build a manifold and T off the plumbing from your return pump. Run one of the lines to a drain. Use a ball valve to open or close the flow to drain the sump without getting your hands wet.

Cobalt Aquatics MJ Pumps are multi-purpose powerheads
you can use for water changes and a variety of other tank tasks.

#4: Refill your tank without making a mess

Once you've removed the appropriate amount of water for your water change (5-25% is common), what is the fastest, easiest way to replace it with fresh saltwater?

For small tanks, carefully pouring the new seawater water from a bucket is probably easiest (although not necessarily the cleanest) way to accomplish this feat. However, if you need to add 10, 20 or 30+ gallons back into the tank, using a bucket is inefficient and messy.

Using a powerhead (perhaps the one you use to mix saltwater) hooked to vinyl tubing can refill your aquarium or sump quickly without making a mess. I recommend plugging your pump into a power strip to prevent wear and tear. This allows you to quickly de-energize the pump once you have pumped all the water out.

You can also attach a U-tube with directional return to hang on the edge of your tank so you won't have to hold the tubing while the water is being pumped.

You can automate water changes using a SpectraPure
LiterMeter III with a SpectraPure Water eXchange Module.

#5: Automate water changes like a boss

You may have thought it impossible, but you can actually automate your water changes.

By combining a SpectraPure LiterMeter III with their Water eXchange Module, you can set up a system that pulls water out of your tank or sump while replacing it with saltwater from an external reservoir. Every lazy reefer's dream, right?

This system allows you to set up a fixed amount of water being pulled out and put back in. The major disadvantages are the start-up costs and the fact that you'll need a drain close by to dump the water into.

Leo Chen's 150 gallon mixed reef aquarium. Click here to view more photos.

Get inspired!

Whether you love or hate doing water changes, I hope the ideas in this article have inspired you to make things easier on yourself or at least reinforced that your already awesome water change routine is supreme.

For more ideas on how to change your water like a pro, visit your favorite aquarium message board or browse this thread on Reef Central. It's helpful to see how other hobbyists utilize different storage containers and equipment to build their water changing stations.

If you know any tips or tricks that make aquarium water changes less of a hassle, please share your insights in the comments below to help us and your fellow hobbyists out!

A Euphoric Ecoscape of Euphyllias

$
0
0

I have always been a big fan of euphyllia sp.corals. They are relatively easy to keep, are extremely colorful and can grow quickly under the right conditions. The way their tentacles sway in the water is also quite mesmerizing.


Another great characteristic is that you can keep euphyllia sp. corals in proximity of each other without having to worry about them stinging or killing each other. Hammers, frogspawns, anchors and octospawns get along very nicely. Torch corals have stronger stinging tentacles and will require a bit of extra space.


With the latest trends in the hobby favoring chalices, zoanthids and limited-edition SPS corals, hobbyists often overlook these gorgeous euphyllia corals.

The positive side to this trend is you can usually purchase a large colony of brightly-colored frogspawn, torch or hammer coral for the same price as a tiny frag of a watermelon chalice or a single polyp of a named zoanthid/palythoa.


Green with brown tips or brown with green tips are the most typical colors and can usually be found at bargain-basement prices.

Some of the more exotic colors included neon green, orange, purple and gold will command higher but still very reasonable prices.

There are also numerous exotic morphs (such as the Gold Torch, Toxic Green Hammer, Bi-Color Frogspawn and the newly available Neon Orange Hammer) that are simply stunning!


Moderate light intensity and medium water flow will keep most euphyllia corals happy. They prefer indirect water current which can be achieved with propeller-style powerheads such as the Hydor Koralia or Tunze Stream.

A pH of 8.0-8.3, alkalinity of 8-12dKH, calcium of 400-450ppm and nitrate less than 10ppm is ideal.

Many will accept, and benefit from, weekly feedings of small pellets foods or morsels of small meaty seafood, such as mysis shrimp or brine shrimp.


In my personal tank, I have collected about 20 different species and morphs of Euphyllia sp. corals over the past year. I have found the branching-type euphyllia corals to be a bit easier to keep than the wall-type.

Additionally, branching euphyllia corals can be very easily fragged/trimmed by simply cutting off branches with  a coral cutter. This collection has become a nice Euphyllia garden that is one of my favorite parts of the aquarium.


What is your favorite Euphyllia coral? Care to share a picture of it?

Reef It Simple, Part 2: Let's Talk Filtration

$
0
0
This is part two in a series about how you can take the complexity out of keeping a saltwater reef tank. Make sure to catch part one, covering aquarium chemistry, to get up to speed.


Now that you're familiar with all of the different numbers for a reef tank and how they work, it's time to talk about filters. As we talked about before, filtration in the marine and reef environments is considerably different from what you'll find in freshwater. But just because it's different doesn't actually mean it has to be more difficult. There’s a lot to talk about here, but the concepts are really very easy. So without further ado, let’s dive in.

What you need to know first off is that water in the tank gets dirty. There’s leftover food, waste from the fish, waste from the corals…and it’s all just there floating in the water. We need a way to get that stuff out. We do that by filtration.

There are three types of filtration that will happen in your system, whether you're talking saltwater or freshwater:
Mechanical filtration happens via skimmers, filter pads and water changes. Biological filtration will be handled by your live rock and sand, and it's the biggest part of your filter. Chemical filtration happens when you push your water through something like carbon or granular ferric oxide. Each of them is important, but they don't have to be difficult.
The bulk of your filtration in a reef system will happen as water passes through the rock and sand that you have used to set up your aquascape (don't worry, aquascape is just a fancy word that we use for "placing your rock and sand"). In a freshwater system, the good bacteria will live in your gravel, but it primarily lives inside of a filter that you've added to the setup. Because reef tanks require significantly more stringent filtration, it's important that you're using the right kind of rock and sand, as well as making sure that you have enough water movement.

Get Moving

First thing's first: we have to get water moving through your rock to start establishing your biological filtration via the nitrogen cycle. As a general rule, how much water movement you need in your tank will depend on the types of corals that you want to have. Soft corals, for instance, have somewhat lower requirements. But if you want a tank that is primarily dominated by SPS (small polyp, stony corals, like acropora pictured below) you will need to have some pretty serious water moving around in the tank.
So how much flow do you need? Here's a pretty simple guide to remember: 
  • Soft Coral: 10-15x display tank volume per hour
  • LPS Coral: 15-20x display tank volume per hour
  • SPS Coral: 30x+ display tank volume per hour
Now you'll notice that I said "guide" as opposed to "rule". That's because you'll find people who are using only 15x turnover but they have absolutely stunning SPS corals. There are very few hard and fast rules in reef keeping and water flow definitely has a lot of flexibility.
But how do you get that much flow through your tank? It's really quite easy, because almost every pump, filter or powerhead that you'll put into your tank will have a flow rating on it. All we have to do is figure out the amount of flow we need, and then buy the equipment to make that flow happen in the right manner. Here's an example:
I have a 40 gallon breeder display tank, with a 20 gallon long that I use as a sump (we'll talk about sumps in a moment). I primarily have LPS corals in my tank (like the branching hammer coral you see below), but I do like to keep some SPS corals too. Because I cross the line between the two types, I want to aim for a flow rate that is somewhere between the high end for LPS and the low end for SPS. Looking at the list above, I settled on a number of around 25x my display tank volume. So 40 gallons, times 25 = 1,000 gallons per hour.
 
In order to reach that number, I had to find the right combination of pumps and power heads. I know that my return pump, which pushes water from my sump up to my display tank, moves around 350 gallons per hour. I still needed another 650 gallons per hour, so I added a Hydor Koralia Nano powerhead on the left and right sides of the tank that was rated for 425 gallons per hour. Though that put me above my 1,000 gallons per hour number, careful placement of the power heads allowed me to have more flow without causing a sandstorm or blowing over my more sensitive corals.
 
HOBs and Sumps and Canisters, Oh My!

Everything that we’ve talked about so far can be referred to as “internal filtration”. It’s the stuff that’s going on inside of your tank. But almost without fail, the most successful reef hobbyists also use some type of external filtration. In smaller systems, using a hang-on-back filter is somewhat common. The Aquaclear series, from Hagen, is especially popular because its basket area leaves a lot of room to stack in the filter media that you would want to use.
Some reefkeepers choose to use canister filters, which are external filters that sit down on the floor. These tend to not be as popular of a choice, however, as it’s easy to forget about them and they’re often a bit of a pain to maintain.
Almost universally, the external filtration of choice in a reef environment is an external sump. A sump is a container, often a smaller aquarium or a custom device that looks like an aquarium, with dividers (called baffles) inside of it that can help to separate the different areas.  For example, take a look at this Berlin sump:

The area on the left is where the water will come from your tank’s overflow. The water first enters this area via a filter sock, which is a very fine piece of cloth that provides mechanical filtration. The area around the filter sock would likely contain some live sand and rock  (for biological filtration). The next area of the sump would likely contain a protein skimmer (for mechanical filtration). The water would then pour over and under the baffles (to remove air bubbles) before being returned to the tank via a return pump.

Sumps provide a number of benefits, but not the least of which being a larger overall volume of water in the system. If you think back to the previous post, you’ll remember that stability is key in a reef system. The more water you have, the more tolerant the system will be of changes. Think of it as a real-life “drop in the bucket” scenario.

Wrapping Up

Filtration in the reef tank can seem really complex, but it’s actually quite simple. It’s easy to get overwhelmed by the options and decisions, but keeping the basics in mind is what will help you to make an informed choice. In a freshwater tank, we let the filter cycle and then we decorate to our heart’s content. Only live plants really serve the purpose of both decoration and filtration. But in the reef, almost every part of the tank plays a part in the filtration dance.

You can make filtration in the reef tank as complex as you want, but often times adding in new pieces before you’re aware of how they work (and the effects that they’ll have) can cause the new hobbyist heartache. We’ll dive in deep with skimmers, media reactors and all kinds of other filtration devices in another post, but for now you have the basics that you need to know about filtering your reef tank.

Cobalt Aquatics Neo-Therm Heaters: A uniquely different and better heater!

$
0
0
With the huge number of heaters available for aquariums, it is often difficult to distinguish the better heaters from the herd. Fancy packaging or a gimmicky design does not always translate to a better product.

Fortunately for the Cobalt Aquatics Neo-Therm Heater, the departure from standard heater design is not gimmicky at all—and its great features make it one of the best heaters you can buy.


Out of the box, the first thing you notice is how thin and sleek this heater is. At about 0.8” thick, this heater is one of the thinnest and best-looking heaters on the market. The slim design makes installation easier and makes the heater less visually and physically obtrusive.

While most heaters utilize delicate glass outer casings, the heating element of the Neo-Therm is encased in a shatter-proof casing that is just about indestructible. This definitely gives hobbyists one less issue to worry about.


The outer casing also has a built-in LED display that ingeniously shows both the set temperature as well as the aquarium temperature. A solid LED light indicates the aquarium temperature is the same as the set temperature. A slow blinking LED indicates the aquarium temperature is lower than the set temperature. A fast blinking LED indicates the aquarium temperature is higher than the set temperature. A single button at the top of the heater allows you easily adjust the set temperature.


While most heaters rely on a mechanical bi-metal thermostats and have an accuracy of ± 1 to 2 degrees, Neo-Therm heaters use an advanced electronic thermostat that has an impressive accuracy of just ±0.5 degrees.

A more constant water temperature creates a stable environment and reduces stress for your fish and corals. Additional safety feature includes a thermal protection circuitry that will shut down the heater before it overheats.


Even with all of these great features, Cobalt Aquatics is able to keep the prices of these heaters very reasonable. With prices ranging from about $50-$80, they are more expensive than most glass/mechanically-controlled heaters but are much cheaper than many digitally-controlled titanium heaters. A long 3-year manufacturer warranty also helps protect your investment.

These heaters offer great features, accuracy and reliability. That's why they earned ‘Best Aquarium Heater’ honors in our Best of 2013 Awards.

If you are looking for a ‘better’ heater, here it is! 

Win a Tunze Nano DOC Protein Skimmer 9002 (a $133.99 value!)

$
0
0

Protein skimmers improve aquarium water quality by forcing protein, waste and other materials into a collection cup for easy removal.

This week we are giving away one of our best-selling nano protein skimmers of all-time, the Tunze Nano DOC Protein Skimmer 9002.

If you're ready to take your nano reef from ordinary to extraordinary, ENTER NOW.

Registration ENDS at 11:59 PM PST on 4/16/14.

Details: Open to U.S. residents 18 years or older. Void where prohibited or restricted by law. Winner will be contacted via email.

The Tunze Nano DOC Protein Skimmer 9002 received "Best Protein Skimmer" honors in the 2011 Marine Depot Best of Awards.

Fed up with carrying buckets? Try an auto top-off system!

$
0
0

Keeping your salinity level stable is one of the most important things you can do as the owner of a saltwater aquarium.

To keep your tank water quality and chemistry appropriate for marine life, you'll need to replace the water that evaporates each day with new, fresh water (that has ideally been filtered through a reverse osmosis system).

The question is: how, exactly, are you going add that fresh water?

New hobbyists generally replace evaporated water (called "topping off") manually by simply pouring the fresh water into their aquarium whenever they get home from work or play.

Of course, this gets pretty old after a while. Who wants another daily chore? Plus, what if you're going to be gone for a few days and don't have any reefkeeping buds nearby to tank-sit?

Well, we are here today to tell you that your aquarium does not have to be a ball and chain that prevents you from getting away for a weekend at the beach or a holiday stay with your folks.

Yup, that's right: you can set up an inexpensive system to automatically top off your tank AS NEEDED, not just when it's convenient for you.

There are several different auto top-off (often abbreviated as ATO) systems available for aquarium keepers, with some more reliable than others (we'll explain later). And, although each ATO system utilizes different technology to achieve the same result—topping off your tank—there are some basic components most of them share. Namely the sensor(s), pump and a fresh water reservoir.

We will briefly explain what role each of these parts plays so you will have a basic understanding of how these systems work. Afterward, you should be armed with enough info to start shopping for your first (or next) ATO, although space, price and product reviews will all likely influence your final decision.


The Sensor

The sensor is the heart of your auto top-off system. Over the years, manufacturers have devised a few different methods to “sense” the water level and when it drops inside your aquarium or sump.

The JBJ Automatic Top-Off System. Click here to watch a video demo.
Float switch 
The original sensor in auto top-off systems. It's also the least expensive and the only option with moving parts. They are very simple and effective, using a buoyant magnet that opens and closes a circuit as the magnet moves up and down with the changing water level. 
The downside is float switches are prone to getting stuck. Snails and other animals may get on to the float and prevent it from reading your water level correctly. Calcium and algae buildup can also cause failure by preventing the float from moving freely. Since these systems utilize a magnet, other magnets nearby can cause interference with the circuit. 
The good news is most manufacturers have already come up with creative solutions to these commons problems, like using plastic shields and/or back-up float switches to prevent failure. The JBJ Automatic Top-Off and Tunze Nano Osmolator 3152 are two examples of popular ATO systems that utilize float sensors. 
The Tunze Osmolator Universal 3155. Click here to watch video demo.
Optical Sensor 
A prism-shaped water level sensor with no moving parts, which makes it less prone to false readings or failure. The optical sensor utilizes an infrared LED light that shines through a prism and is directed into a light receiver. If no liquid is present, then the light will be directed into the light receiver and the pump will be activated. When the water level rises, light is refracted through the water leaving little light to reach the receiver and the pump is then deactivated. You can find this method used on the Tunze Osmolator 3155 and AutoAqua Smart ATO
When Tunze incorporated this type of sensor into the Osmolator 3155, they created one of the most foolproof ATO systems to date. It uses both an optical sensor and a backup float switch to avoid the failures associated with other ATO systems on the market. As the water level drops, the optical sensor will turn on the pump. If it fails to turn off when water levels rises, the float switch is then used as a fail-safe.
The Hydor Smart Level ATO System. Click here to watch a video demo.
Temperature Sensor 
These ATO systems feature a heating element and temperature sensor in an impressively small package. When the probe is submerged in liquid, it causes heat to dissipate quickly and the temperature sensor to cool. When the water level drops below the probe, it heats quickly, making the temperature sensor warm thereby activating the pump. 
With no moving parts, this is a very reliable option that rivals even the Tunze Osmolator 3155. The Hydor Smart Level and the Elos Osmocontroller both utilize variations of a temperature-based sensor.
The Innovative Marine AUQA Gadget HydroFill ATO System.
Click here to watch a video demo.
Conductivity Sensor
This method utilizes two probes that, when immersed in liquid, complete a mild electrical circuit path through each probe to deactivate the pump. Once the water level drops below the probes, the electrical circuit is broken and the pump is activated. This system features no moving parts and are one of the more reliable sensor options. The recently released Innovative Marine HydroFill utilizes a conductivity sensor system.
No matter which system you choose, the most important factor in keeping your ATO system operational is keeping the sensor clean and free of obstructions. All of the aforementioned sensors should be cleaned and checked monthly to ensure proper operation.

A typical 5-gallon water jug used in the aquarium hobby for storing water.

The Reservoir

As the name implies, a reservoir stores fresh water used for topping off your system. The most commonly used types of reservoirs are 5 gallon buckets or plastic jugs. These are cheap, easy and get the job done. Just be sure that your pump fits into the container!

Another option is to use a custom glass or acrylic container. Old aquariums and sumps make great ATO reservoirs. Using them may require a little more planning, but the end result is generally a cleaner, more compact-looking setup. Most reservoirs can be concealed inside your aquarium stand or hidden behind a piece of furniture.

If you have a large aquarium, a 5-gallon reservoir is not going to cut it. A bigger tank requires a bigger reservoir since you'll be losing a lot more water from evaporation.

A Rubbermaid Brute Trash Can or large polyethylene plastic tank can fill this void. Top-off water containers for bigger tanks usually reside next to the tank, in a nearby closet, inside the garage or, if you're lucky enough to have space, a "fish room" (your basement, perhaps?). It is quite simple to run ¼” plumbing and small wires through a wall or door!

The main things to be concerned about here are choosing a water-safe container large enough to accommodate your tank to make automation worthwhile. Ideally, you want a container large enough to store 5-7 days worth of fresh top-off water—but not so large that the water will become  stagnant and harbor bacteria.

The Tom Aquatics Aqua-Lifter Dosing Pump. Click here to watch a video demo.

The Pump

A pump is a crucial part of your ATO system because it transfers water from your fresh water reservoir into your aquarium. Some ATO systems come with the pump included, such as the Elos Osmocontroller, Tunze Osmolator and AutoAqua Smart ATO.

Fortunately, it is easy to select, purchase and connect a pump to an ATO system for a custom setup if the model you're interested in does not include the pump.

The best and most reliable option is a dosing pump. They do not run the risk of dry-run and pump water at a slow rate. This makes for a safe-operating ATO system that will not quickly overflow your aquarium in the event of failure. These pumps are not submersible and will require external mounting above your reservoir.

The Tom Aquatics Aqua-Lifter is a vacuum-style dosing pump and one of the most popular (and affordable) top-off pumps available. I prefer peristaltic dosing pumps, such as the Aqua Medic SP 3000, because they provide a consistent flow, resist ware and will last much longer when properly maintained. They produce less vibration which equals quieter operation. If your container has a small opening, a dosing pump is optimal since it's external and will use tubing with a small diameter to pull the water out of your container.

The second option is a submersible pump, such as the ever-popular Cobalt MJ Series and Taam Rio pumps. Submersible pumps are easy-to-use, provide an inexpensive alternative to peristaltic dosing pumps and quickly deliver water to your aquarium. Most ATO systems that do not include a pump have a US standard 3-prong female plug to accept a submersible pump.

The downside to submersible pumps is they pump water quickly and are susceptible to dry-run. You have much less time before the tank overflows in the event of failure when compared to dosing pumps. If you forget to fill up your fresh water reservoir and the pump is activated, it will run dry, heat-up and, quite possibly, damage the pump beyond repair.

If you are tired of carrying buckets and pouring in cups of fresh water everyday... try an auto-top off system!

You will reduce daily tank maintenance, gain peace of mind that your water chemistry is stable and free up time to better enjoy your peace of the reef.

Can’t We All Just Get Along?

$
0
0
Every fish has its own personality and will often behave differently than what we expect.  Sometimes it is a good thing, like a typically-aggressive clown tang that is the most peaceful fish in the aquarium.

Other times it is a bad thing, as in my case here where an ocellaris clownfish recently transferred from a different tank decided that he needed to beat up a new Wyoming White clownfish. I did anticipate some aggression, but definitely not to this degree.


This is where a quarantine tank, fish trap or specimen container comes in extremely handy. I was able catch the trouble-maker and isolate him in the new CPR CITR PRO In-Tank Refugium.


The new CITR PRO looks much more robust than the standard model. Instead of the small round drilled holes, it has nicely-machined slots to allow for better water flow.


The small suctions cups are also replaced by a versatile bracket that can be mounted to either a horizontal or vertical surface. This bracket is very thoughtfully designed and accommodates different aquarium rim widths (for standard aquariums, rimless aquariums or euro-braced aquariums) as well as allowing adjustment of the height of the container.


The CITR PRO is offered in two sizes. The small version is 7.5" x 4.25" x 7.25" and the large model measures 12" x 6" x 8". They are also offered with and without pumps. Shown here is the smaller of the two models.


With the aggressive clownfish in the ‘time-out box’, the new clownfish now has a chance to get established without being harassed.  In a week or so, the troublemaker will be released back to the aquarium and will hopefully get along with the now-established Wyoming White clownfish. If not, the trouble-maker will be relocated to a different aquarium.

Hydor Smart Level Control ATO System: Simple, Inexpensive and Effective

$
0
0


As aquarium automation marches toward being the norm rather than a luxury enjoyed by few, more and more products have been made available to make maintaining your reef aquarium easier than ever before.


Numerous new automatic top-off systems have been introduced recently to meet the demands of the modern aquarium hobbyist. Not only do ATOs save you the trouble of topping off your aquarium daily, it also helps to maintain a stable salinity level that is better for your aquarium inhabitants.


Among these new ATOs is the Hydor Smart Level Control ATO System. This new ATO from Hydor is just about as easy-to-use as can be!

It uses an advanced thermal sensor to accurately maintain the water level in your sump. With no moving parts, you do not have to worry about mechanical floats getting stuck or issues caused by calcium deposits, bacterial film, wave action or snails climbing on to the sensor.

Green LED indicating low water level

The compact sensor easily mounts in your sump with magnets. The three-prong sensor has sensors for minimum water level, maximum water level and alarm. A 6-foot cord connects the sensor to the main control unit and there is another 6-foot power cord that plugs into the wall, so you have plenty of cabling to work with.

Red 'Alarm' LED and an audible alarm indicating water level raising to high

A two-prong plug is provided for you to attach any pump of your choice for top off (up to 50W). An ideal pump should slowly top off your aquarium and take 25 seconds to 10 minutes to go from the minimum to maximum level, which spans 8mm-12mm (1/3” – ½”) from minimum to maximum. The Cobalt MJ-Series or Eheim Compact powerheads work nicely for most applications.

Updated polarized plug

When the Smart Level was initially released, Hydor had included a non-polarized socket, which made pumps with polarized plugs incompatible. Customers were limited to using Hydor pumps or would have to get an adapter. Fortunately, this has since been corrected and now a polarized socket is included so you can use just about any pump up to 50W.

On/Off switch with a thoughtful water-resistant cover

If the water level reaches the “Alarm” level, the Smart Level will illuminate all LEDs, cut off power to the pump and trigger an audible alarm. Operation goes back to normal once the water level drops below the “Alarm” level.

The alarm will also trigger if top-off takes longer than 10 minutes, which can occur if the top-off reservoir runs dry or the top-off pump fails. In this scenario, the system will shutdown to protect the pump and will need to be restarted by pressing the on/off button.


Another great aspect of the Hydor Smart Level Control is its price. At less than $100, it is the only ATO in this price range that does not rely on a mechanical float. With its practical design, great safety features and affordable price tag, the Hydor Smart Level ATO makes a great case for itself.

If you have been waiting for an economical and easy-to-use top-off system, the Hydor Smart Level Control may be just what you are looking for.

How to Hang an Aquarium Light with a Suspension Kit

$
0
0
Lighting for your reef aquarium is one of the most studied, discussed and documented topics in hobby. The reason is because proper lighting is crucial to the success of keeping photosynthetic corals, which are the most popular organisms placed in a reef tank. Much of us spend quite a bit of time researching and discussing the lighting for our own reef aquariums before a decision is made.

One factor that plays a big role in the light fixture you choose is the mounting options. Some fixtures will require a suspension mount while others are suitable for mounting directly onto your aquarium. It is important to ensure the mounting options available will work for your tank.

The idea of suspending an aquarium light can raise alarms for many hobbyists. The worry of falling fixtures, suitable anchors and overall aesthetics can quickly steer a concerned hobbyist away from this option. We are going to shed some light on this topic and show you that suspending a light fixture is actually safe, easy to do and looks great over just about any aquarium.


Some of the best looking contemporary aquariums are rimless tanks with a light fixture or light rack suspended from the ceiling. When done properly, this type of mount looks really great but requires some crucial planning to ensure the outcome is desirable.

First, you will need to decide how to anchor the suspension cables into your ceiling. Most suspension kits supply the cables and adjustment hardware but some also include anchoring hardware, so be sure to do your research while shopping.

You may get lucky and be able to anchor the cables directly into a wooden stud. Chances are though the placement of your aquarium will not match the infrastructure of your home perfectly so an alternate anchor-style will be required.

Using toggle bolts are an easy way to safely anchor the suspension cables into a drywall ceiling. Make sure the bolts are long enough to reach through your ceiling completely. Check the weight ratings to ensure they are strong enough to support the weight of your light fixture.

After deciding on an anchor, you will need to take a few measurements and gather a few tools to install the anchors properly and in the right place.  I have found that using a laser level and chalk line to make a few markings on your ceiling will make it quite easy to find the right spots to install your anchors. This is important to ensure the light fixture is perfectly centered over your aquarium and the cables are perpendicular to your tank.


The suspension mount for the EcoTech Marine Radion LED Light Fixtures over our office aquarium (outlined in the video above) was accomplished in about 20 minutes total.

The use of mounting arms is becoming a more popular option these days and is a great for those of you who want the benefits of suspending a light but cannot tap into the ceiling.

Most of the mounting arms I have seen available are designed to directly mount to the back of your aquarium stand. These arms are also fairly simple to build at home using some electrical conduit. Before deciding on this option, be sure you have enough access behind your tank to properly attach the mounting arms.
With many of us switching to LED light, the use of suspension mounting can make it much easier to acclimate your corals as it gives you the ability to easily raise and lower and your light fixture. It also makes maintenance much easier as the light can be quickly raised up out of the way. Keeping an open-top aquarium increases gas exchange and helps dissipate heat much quicker.
With such a plethora of benefits, it is hard to argue against suspending your light fixture—it's one of the best ways to mount your reef aquarium lighting.


The information presented in this article is based upon my personal experience. MarineDepot.com is not responsible for damages that may result from installing your aquarium lights. Each situation is different; please contact our tank tech team directly for one-on-one support if you need assistance.

Real Reef Shelf Rock: Recreate the Tonga Look and Save a Reef

$
0
0

One of the most important, yet often forgotten, pieces of any saltwater reef is the aquascape. The ideas behind designing great scapes have changed a lot over the years, but the basics are the same:
  • Provide an amount of rock adequate for filtration.
  • Arrange it in a manner that is visually appealing.
  • Leave proper spacing and height for different coral placement.
But for me there was one more piece that was crucial—I wanted something that had absolutely no chance of harming our coral reefs. Conservation of our reefs (and teaching the same to my kids) is really important to me, so I knew that I had some work ahead in order to find the rock that I wanted.

I had already done an aquascape in my 40 breeder using AquaMaxx Dry Reef Rock (which is harvested on land, from an ancient reef) but I wanted to mimic the rock shelves that we see in the oceans around Tonga.

Unfortunately, many of the reef areas around Tonga have been harvested to the point of destruction. Most of the shelf rock that you'll find today is actually from Indonesia or Fiji, and doesn't do a very good job of replicating the flatter, wide surface of the Tonga rock.

Before: Lots of AquaMaxx Dry Reef Rock
Fortunately the folks at Real Reef have an answer in their Real Reef Shelf Rock. It's real rock, just like you'd find in the ocean, but it's grown in an enclosed environment so it has absolutely no effect on the ocean. It looks and feels just like the "real" thing, because it is the real thing.


I was sent 40 pounds of Real Reef shelf rock for my aqauscaping project, and I was wildly impressed with the quality of the product. It's porous, has great shape and it looks like it's already covered in purple coralline algae. It's also seeded with nitrifying bacteria, so you can use the rock to help cycle a new tank even faster.


And Now, The Design


After gathering some ideas from my local reefing group on Facebook, I decided on a lagoon or cove-style design. I knew that I had some corals that would need space in the sand bed, so I wanted to leave plenty of open space there. But I also wanted a lot of varying height to the main aspect of the aquascape so the lagoon idea worked out very well.

I started by washing the Real Reef rock in RO/DI water to remove any fragments or dust that came off in shipping. I then laid out all of the rock and found some pieces that fit not only the size that I was looking for but also the shape.

Once I found the pieces that I wanted, we started moving the base rock into place to form the overall structure. Since all of my base rock was already in the aquarium and cured, we had to do a bit of underwater work with the epoxy and gel adhesive. Overall though, I'm very happy with how the rock stacked together, as well as the shape the it provided.


One thing to note: unlike the "natural" rock that you often find, Real Reef Shelf Rock will not have the trunks attached to it. You will need to build these yourself out of base rock. It wasn't a problem, but had I known that in advance I definitely would have kept some base rock out of the water to help make this process a bit easier.

Top down. You can pretend you don't see those diatoms!
The aquascape that you see here fills about 1/2 of my tank. I used around 15 pounds of the Real Reef Shelf Rock to provide one main shelf, a couple of "bridge" areas and then some smaller shelves toward the top of the structure. The fish seem to love hanging out under the cover that the shelves provide, and the ample flat space leaves me loads of room for coral placement as I find more pieces that I love.

Say hello to P.T. He's such a ham!
So what would I have done differently? As I said before, I definitely would have ordered a bit more rock and kept it dry to help ease the gluing process. I also would have set up my tank with Real Reef Shelf Rock the first time, instead of aquascaping after the fact! Other than that, I'm incredibly happy with the results and I can't wait to do the left side of the tank next. I decided to wait on that side, following my own advice of having some dry rock to work with first.


All said and done, I would absolutely recommend Real Reef Shelf Rock for anyone who wants to mimic that Tonga reef look. I'm still thinking up what I want to do on the left side, but experience now tells me that no matter what I choose, it's going to look great.

Hydor Nano-Skim Protein Skimmer Review: Great Skimmer for the Nano Crowd!

$
0
0

Have you ever been told you don't need a protein skimmer because you have a small aquarium?

This may be true if you are doing big weekly water changes and have a light stocking level—or if you just have very easy-to-keep fish and corals. Most nano aquariums tend to be more heavily stocked than larger aquariums and very few hobbyists perform water changes as often as what is considered "ideal."

The truth of the matter is that a protein skimmer always makes your water cleaner and is helpful in aquariums of every size.


Having a protein skimmer also gives you more options in nitrate and phosphate control. Both biopellets and liquid carbon-dosing, such as RedSeaNO3:PO4-X and AZ-NO3, require the use of a protein skimmer for nutrient export.

The Hydor Koralia Nano-Skim and Slim-Skim protein skimmersare great options and have been very popular with our customers. The Nano-Skim is rated for aquarium up to 35 gallons while the Slim-Skim is rated for aquariums up to 65 gallons. These skimmers are well-designed, easy to install, easy to adjust/clean and are very reasonably priced: which are likely the reasons for their popularity.


Out of the box, the Nano-Skim has a nice, solid, feel. The Hydor logo cut-out on the outlet is a very nice touch. All acrylic pieces look to be very nicely made and fit together well, which is impressive for a skimmer this size and in this price range. With a small footprint of just 3 1/8" x 3 1/8", it is also one of the smallest skimmers and should make installation easier for many applications.

Once the skimmer and pump have been assembled, simply place the skimmer in your aquarium (with the water level about half way up the outlet) then use the included magnets to attach the skimmer to your aquarium. Next, plug in the pump and you are good to go.

As with all skimmers, it will take a week or two for the skimmer to break in. Once broken in, the only adjustment needed is the height of the collection up: raise it for drier skimmate and lower it for wetter skimmate.


After the initial break-in period, the Hydor Nano-Skim has been working very well in my 34-gallon Solana and pulling out lots of dirty skimmate. Prior to using a skimmer, I constantly had trouble keeping my nitrates below 30ppm—even with 30% bi-weekly water changes. And yes, I am guilty of knowingly overfeeding my fish.

Now with the skimmer in place and carbon-dosing, my nitrates have decreased dramatically, the corals are looking happier and I can freely feed my fish without feeling guilty.


Although protein skimmers are never required, they are beneficial to every aquarium because they remove waste before it breaks down, thus keeping the water cleaner. Many hobbyists consider protein skimmers to be the heart of their filtration systems. With marine fish and corals being as delicate as they are, any equipment that can improve water quality is always welcomed.

If you have a nano or smaller aquarium, the Hydor Nano-Skim and Slim-Skim may be just what your system needs to go from ordinary to extraordinary.

Viewing all 374 articles
Browse latest View live